Sometimes a hosting provider moves reseller accounts to a new server or upgrades their infrastructure. When this happens, the IP address connected to your private nameservers may need to be updated.
If the old IP address remains unchanged, domains using your nameservers may stop resolving properly. Websites might show errors or fail to load.
This situation once happened to a reseller who had many client websites running under his private nameservers. After his hosting provider migrated him to a new server, the websites stopped loading. The issue turned out to be simple — the nameserver IP address still pointed to the old server. After updating it from the client dashboard, everything worked again.
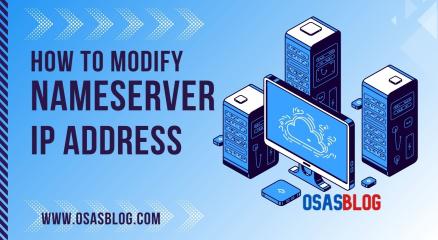
In this guide, you will learn exactly how to modify the reseller nameserver IP address from your hosting client area step by step.
What You Need Before Starting
Before you begin, make sure you have the following information ready.
Requirement
Description
Hosting client area access
Your login details for your hosting account
Reseller domain
The domain used for your private nameservers
Existing nameserver
Example: ns1.yourdomain.com or dns1.yourdomain.com
Old IP address
The IP address currently assigned to the nameserver
New server IP address
The IP address provided by your hosting provider
Your hosting provider usually provides the new IP address during server migration or setup.
Quick Video Guide
https://youtu.be/Vh3CqVlhF_0
Step-by-Step Text Guide
Step 1 — Log in to Your Client Area
Open your browser and visit your hosting provider’s website.
Find the Client Area or Login button.
Enter your:
Email address
Password
Then click Login.
After logging in, you will see your client dashboard, where you can manage domains and hosting services.
Step 2 — Open the Domains Section
On the dashboard menu, locate the Domains option.
Click Domains.
Step 3 --- A list of domains connected to your account will appear.
Look for the domain used for your reseller nameservers.
Example:
yourdomain.com
Click on that domain to open its management page.
Step 4 — Open Private Nameserver Management
Inside the domain management page, find the option labeled Private Nameservers.
Click Private Nameservers.
This section allows you to manage your custom nameservers.
Step 5 — Locate the Modify Nameserver Section
Inside the private nameserver page, you will see three available options:
Option
Purpose
Create Nameserver
Register a new private nameserver
Modify
Change the IP address of an existing nameserver
Delete
Remove a private nameserver
To change the IP address, go to the Modify section.
Step 6 — Enter the Nameserver and IP Addresses
In the Modify section, you will see fields where you can update the nameserver information.
Enter the following details:
Nameserver
Type the nameserver you want to modify.
Example:
ns1
or
dns1
(depending on the nameserver format you use)
Old IP Address
Enter the current IP address assigned to that nameserver.
Example:
192.168.1.10
New IP Address
Enter the new server IP address provided by your hosting provider.
Example:
45.67.89.100
After entering the information, click Save Changes.
Step 7 — Repeat for the Second Nameserver
Most reseller setups use two nameservers.
Example:
ns1.yourdomain.com
ns2.yourdomain.com
Repeat the same process for the second nameserver if necessary.
Example update:
Nameserver
Old IP
New IP
ns1
192.168.1.10
45.67.89.100
ns2
192.168.1.11
45.67.89.101
[Diagram: modifying second nameserver IP]
Step 8 — Allow Time for DNS Update
After saving the changes, the new nameserver IP address will begin updating across DNS networks.
This process is called DNS propagation.
Time
What Happens
Immediate
System saves the new IP
1–4 hours
Some networks update
Up to 24 hours
Global DNS update completes
During this time, some websites may still resolve using the old server.
Common Mistakes Beginners Should Avoid
These mistakes often cause problems when updating nameserver IP addresses.
Mistake
Explanation
Entering the wrong old IP address
The system may fail to update the record
Typing the wrong nameserver
The modification will not apply
Updating only one nameserver
Both ns1 and ns2 should usually be updated
Forgetting to save changes
The update will not take effect
Always double-check your entries before saving.
Helpful Tips
Confirm the new server IP with your hosting provider
Never guess the IP address. Always use the exact IP provided by your host.
Use consistent nameserver formats
Example:
ns1.yourdomain.com
ns2.yourdomain.com
or
dns1.yourdomain.com
dns2.yourdomain.com
Mixing formats can sometimes cause confusion.
Test your websites after updating
After the update, open one of your hosted domains to confirm it loads correctly.
Let Me Conclude
Updating the reseller nameserver IP address from your hosting client area is an important step when servers change or accounts are migrated. Once you know where to find the private nameserver management section and how to modify the IP address, the process becomes straightforward. Following the steps carefully ensures your domains continue pointing to the correct server without interruption.
Starting a website always begins with one important thing — a domain name.
A domain name is the address people type in their browser to reach your website.
Examples include:
google.com
facebook.com
osasblog.com
If you want to start a blog, a business website, or even an online store, the first step is buying a domain.
When I bought my first domain years ago, I was honestly confused. Many websites were selling domains, prices were different everywhere, and I was not sure which buttons to click.
But once I went through the process step by step, I realized it was actually very simple.
In this guide, you will learn exactly how to buy a domain name online, even if you have never done it before.
Video Guide
https://www.youtube.com/watch?v=aXA9FmTwD1o
What You Need Before Buying a Domain
Before starting the purchase process, make sure you have these things ready.
• the domain name you want to buy
• an email address
• a payment method (card, PayPal, or other supported option)
It also helps to think of two or three alternative names, in case your first choice is already taken.
Step 1 — Choose a Domain Registrar
A domain registrar is a company that sells domain names.
Some popular registrars include:
• Namecheap
• GoDaddy
• Porkbun
• Google Domains
• Dynadot
• Zenoxcloud
These companies are accredited to register domain names.
For this tutorial, the steps are similar across most registrars.
Step 2 — Open the Domain Registrar Website
Open your web browser and visit the registrar website.
When the homepage loads, you will usually see a domain search box.
This search box allows you to check whether the domain you want is available.
Step 3 — Search for Your Domain Name
Click inside the search box and type the domain you want.
Example:
osasblog.com
Then click the Search button.
The system will now check if that domain name is available.
Step 4 — Check Domain Availability
After searching, you will see one of two results.
If the domain is available
You will see something like:
"Great news, this domain is available."
If the domain is already taken
The registrar may show suggestions like:
• osasblog.net
• osasblog.org
• osasblogonline.com
Choose the one that works best for you.
Step 5 — Add the Domain to Cart
Once you find an available domain you like, you will see a button such as:
Add to Cart
Buy Now
Register
Click the button.
The domain will now be added to your shopping cart.
Step 6 — Review the Domain Purchase Page
On the cart page, you will see several options.
Typical options include:
• domain registration period
• privacy protection
• auto renewal settings
Here are some tips.
Registration Period
You can usually register a domain for 1 to 10 years.
Beginners often start with 1 year.
Privacy Protection
Some registrars offer WHOIS privacy protection.
This hides your personal details from public databases.
Many registrars offer this free.
Auto Renewal
Auto renewal ensures your domain renews automatically before expiration.
This helps prevent losing your domain.
Step 7 — Create Your Account
Before completing the purchase, the registrar will ask you to create an account.
You will need to enter:
• your name
• email address
• password
• contact details
Make sure the email address is correct because you will receive important domain notifications there.
Step 8 — Enter Payment Details
Now you will see the checkout page.
Choose your payment method.
Most registrars accept:
• debit cards
• credit cards
• PayPal
• digital wallets
• Bank Transfer
Enter your payment information and confirm the purchase.
Step 9 — Complete the Purchase
After payment is successful, you will see a confirmation message.
Your domain is now officially registered.
You will also receive an email confirming your purchase.
Step 10 — Access Your Domain Dashboard
Log into your registrar account.
You will now see your domain listed in your dashboard.
From here you can:
• manage DNS settings
• connect hosting
• update nameservers
• enable domain forwarding
This is where you control how your domain works.
Common Mistakes Beginners Should Avoid
Many beginners make small mistakes when buying domains.
Avoid these common issues.
Buying From Untrusted Websites
Always buy domains from well-known registrars.
Unknown websites may cause problems later.
Choosing Very Long Domain Names
Long domains are harder to remember.
Short, simple names are usually better.
Example:
bestdigitalmarketingtoolswebsite.com ❌
digitaltools.com ✔
Forgetting to Renew the Domain
If a domain expires, someone else may register it.
Always enable auto renewal.
Tips for Choosing a Good Domain Name
If you are starting a blog or business website, keep these tips in mind.
• choose something easy to spell
• avoid numbers and hyphens
• keep it short and memorable
• use common extensions like .com when possible
Good domain names are simple and easy to remember.
RoundUp
Buying a domain name is the first step toward building a website.
Although it may seem confusing at first, the process is actually very straightforward.
You simply choose a domain registrar, search for your domain name, add it to your cart, create an account, and complete the payment.
Once the purchase is complete, the domain becomes yours and you can begin connecting it to hosting or building your website.
Introduction
Let me tell you a short, real story.
A few months ago, I met someone who had just started a small online shop. His products were good. His website looked clean and professional. People were even visiting his site.
But there was one big problem—he had no proper way to stay in touch with those visitors after they left.
So he did what most people do at the beginning. He started sending emails using his personal Gmail account.
At first, everything looked fine.
He sent 20 emails. Then 50. Then 100.
Then things started going wrong.
Some emails stopped delivering. Others went straight to spam. Then one day, he saw a warning:
“Your account has been restricted for unusual activity.”
He panicked.
He had spent time building his email list, and suddenly, he couldn’t reach any of them.
That moment made something very clear to both of us:
Sending an email is easy.
But sending the right email, to the right person, at the right time—and making sure it actually reaches their inbox—that’s a different game. And you need the right tool for it.
Maybe you’re in that same situation right now.
Maybe you’ve tried sending emails from your regular account, and it stopped working.
Maybe you’re asking yourself:
“Which bulk email service is actually good for beginners like me?”
“Why do my emails keep going to spam?”
“Is there a simple and affordable tool I can use without stress?”
“How can I grow my OsasBlog audience without looking like a spammer?”
If any of these sound like you, don’t worry—you’re not alone.
And you’re in the right place.
This guide is not about confusing tech terms or empty promises. It’s about helping you choose a tool that works—something simple, reliable, and effective.
So you can focus on what really matters: creating good content, sharing value, and building trust with your readers.
Because at the end of the day, email is not just about sending messages.
It’s about starting real conversations.
And with the right bulk email service, you can do that easily, safely, and at any scale.
What You Will Learn
By the end of this guide, you will clearly understand:
How bulk email services really work
The top 15 best email platforms in 2026
Which ones are beginner-friendly
Which ones are powerful for scaling
How to choose the right one for your needs
Mistakes that can destroy your email success
Quick Answer
A bulk email service provider is a platform that helps you send a large number of emails to many people at once, while making sure your messages actually reach them and perform the way they should.
It’s not just about clicking “send” to thousands of contacts. It’s about doing it the right way—so your emails land in the inbox (not spam), your audience stays engaged, and you avoid both technical and legal problems.
High deliverability
This means the platform works behind the scenes to build trust with email providers like Gmail, Yahoo, and Outlook. It uses clean and trusted servers, monitors your sender reputation (which works like a credit score for your email), and slowly warms up new sending addresses instead of sending too much at once.
It also controls how fast emails are sent to avoid raising red flags. Before sending, it checks your content for spam triggers like too many exclamation marks, suspicious links, or poor balance between text and images, and warns you if something looks risky.
The result is simple: more of your emails reach real inboxes instead of the spam folder.
Proper email authentication (DKIM, SPF, etc.)
These act like digital ID cards for your emails.
SPF tells email providers which servers are allowed to send emails on your behalf. DKIM adds a secure signature to each message so the receiver knows it truly came from you and was not changed. DMARC sets rules for what should happen if something fails and also sends you reports so you can detect problems.
A good bulk email platform helps you set all this up step by step, even if you are not technical. Without these, your emails can look suspicious and may be blocked or ignored.
List management and automation
This is about keeping your contacts organized and your messages relevant.
You can import your contacts, clean your list, and group people based on things like interest, behavior, or when they signed up. For example, you can separate new subscribers, active readers, or customers.
The platform also removes invalid emails, handles unsubscribes instantly, and respects user preferences.
Automation allows you to create emails that send automatically, such as welcome messages, birthday offers, blog updates, or follow-ups based on what someone did or didn’t do. You set it up once, and it keeps working for you without manual effort.
Tracking
You don’t have to guess what is working.
The platform shows you clear data like who opened your email, which links were clicked, what device was used, and whether someone took action like signing up or making a purchase.
This helps you learn quickly—what subject lines work, what content performs best, and when your audience is most active—so you can improve every time you send.
In simple terms
It is the professional tool for sending emails safely, efficiently, and at scale.
Think of it like this: sending bulk emails without a proper service is like trying to run a delivery business using your personal car and a handwritten notebook. You might manage a few deliveries, but very soon you get overwhelmed, waste time, and make mistakes.
A bulk email provider works like a full logistics team. It handles delivery, tracking, compliance, and optimization, so you can focus on your message instead of the technical side.
It gives you the power of a large company’s email system without needing a large team. Whether you are sharing blog updates, sending business emails, or growing an audience, it ensures your message is delivered clearly, legally, and consistently.
What Bulk Email Services Really Do
Simple Explanation
Think of a bulk email service like a professional courier system.
Instead of you delivering letters yourself, the system handles everything — safely and efficiently.
Deeper Explanation
These platforms manage complex processes behind the scenes:
They use trusted servers
They control sending speed
They build sender reputation
They ensure emails pass spam filters
Without this system, your emails are treated as suspicious.
Deeper Evaluation
Email providers like Gmail don’t trust random senders.
If you suddenly send 1,000 emails from your personal account:
You get flagged
Your emails go to spam
Your account may be limited
Bulk email platforms solve this using:
Verified sending domains
Authentication protocols
Warm-up systems
Practical Understanding
Let’s make this very simple with a real-life picture.
Sending bulk emails manually = Walking from house to house, knocking on every door, and hoping someone lets you in.
You’re putting in effort. But most doors stay closed. Some people get annoyed. And after a while, the neighborhood security (that’s Gmail, Yahoo, and others) starts watching you—or even stops you completely.
Using a bulk email service = Being invited into people’s homes because they already know and trust you.
You still knock—but only on doors of people who already said, “Yes, I want to hear from you.” And when you enter, you can share something useful, start a conversation, or help—without worrying about being rejected.
That’s the real difference.
It’s not just about reaching more people. It’s about reaching the right people in a way that feels natural and helpful, not forced.
Now think about your OsasBlog.
When someone subscribes, they are giving you access to their inbox. That’s trust.
A bulk email service helps you respect that trust by:
Making sure your emails arrive properly (not ending up in spam)
Keeping your email list clean (so you only message people who are interested)
Helping you send the right content at the right time (like blog updates, tips, or useful messages)
Showing you what is working so you can improve every time
Without the right tool, you are just guessing.
With the right tool, you are building a real relationship—one email at a time.
So yes, you can keep knocking on doors manually.
But it’s better when people are already waiting to welcome you in.
Top 15 Best Bulk Email Service Providers in 2026
1. Mailchimp – Deep Practical Understanding
Mailchimp is one of those tools that makes things feel easy, even if you don’t know anything about email marketing.
The moment you enter the platform, everything is already arranged in a way that guides you. You are not guessing what to click or what to do next. It walks you through the process step by step.
When you add people to your email list, Mailchimp doesn’t just store them. It starts watching how they behave.
It knows:
Who opens your emails
Who clicks your links
Who ignores everything
From there, it helps you separate your audience without stress.
So instead of sending the same message to everybody, you can send different messages based on how people behave. That alone can improve your results a lot.
Another thing Mailchimp does very well is how your email looks when it gets to people.
You don’t need to design anything from scratch. You just pick a template, adjust it, and you’re good. The emails are already arranged to look clean on phone and desktop.
That matters because most people read emails on their phones.
Now let’s talk about automation.
Mailchimp allows you to set simple flows like:
When someone joins your list → send welcome email
When someone clicks something → send another email
When someone stays inactive → send reminder
It feels simple, but it is powerful when used well.
The only issue is that the deeper automation is not fully available on cheaper plans. As your needs grow, you’ll notice you have to upgrade.
Then comes the pricing.
Mailchimp charges you based on how many contacts you have. Not how many emails you send.
So even if someone on your list is not active, you are still paying for that person. As your list grows, your cost grows too — and it can become expensive faster than expected.
Also, Mailchimp is strict.
If your emails look spammy or your list is not clean, they can limit or suspend your account. This is good for deliverability, but you need to be careful.
Pros
Very easy to use, even if you’re new
Helps you understand your audience behavior
Emails come out clean and professional
Good inbox delivery (emails don’t easily enter spam)
Strong support for beginners
Cons
Becomes expensive as your list grows
You pay for inactive contacts too
Advanced features are locked behind higher plans
Strict rules can affect your account if not careful
2. Brevo (Formerly Sendinblue) – Deep Practical Understanding
Brevo works differently from Mailchimp, and that difference is what makes it powerful.
Instead of focusing on simplicity first, Brevo focuses on control and cost.
The biggest thing to understand is this:
Brevo does not charge you for how many contacts you have.
It charges you for how many emails you send.
That changes everything.
You can have a very large list, and still pay less — as long as you’re not sending emails every single day.
So if you’re running a business where you send emails occasionally, Brevo saves you money.
Now, beyond email, Brevo is more like a full communication system.
You can:
Send emails
Send SMS
Manage customer data
All inside one place.
This is useful because customers don’t always respond to email alone. Sometimes SMS works better, especially for urgent messages.
Brevo also gives you a simple CRM system.
This means you can see:
What each customer has done
What they clicked
How they interacted with your business
This helps you send more personal messages instead of random broadcasts.
Now let’s talk about automation.
Brevo allows you to build flows based on what users do.
For example:
Someone signs up → they get a welcome email
Someone ignores your emails → they get a reminder
Someone takes action → they get a follow-up
The good thing is that Brevo gives you access to these features even on lower plans. You don’t need to spend too much before you start using real automation.
But Brevo is not perfect.
The design side is not as smooth as Mailchimp. Templates are more basic, and the interface is not as polished.
Also, the analytics are simple. You can see results, but not in a very deep or visual way.
Pros
Much cheaper for large email lists
You don’t pay for stored contacts
Includes email, SMS, and customer management
Good automation without needing expensive plans
Suitable for growing businesses
Cons
Their interface is not as smooth or beginner-friendly
Email designs are more basic
Analytics are not very detailed
Daily sending limits on free plan
Not as many integrations as bigger platforms
3. ConvertKit – Deep Practical Understanding
ConvertKit is built mainly for people who are growing an audience, not just selling products.
Think of bloggers, content creators, newsletter writers — people whose strength is connection, not just promotion.
The way ConvertKit works is very different from tools like Mailchimp.
Instead of focusing heavily on email design, it focuses on people and relationships.
When someone joins your list, ConvertKit doesn’t just see them as a contact. It allows you to tag them based on what they do.
For example:
Someone downloads your ebook → you tag them as “interested in ebooks”
Someone clicks a link → you tag them based on that interest
Someone buys something → you tag them as a customer
So instead of managing one big list, you’re building a smart audience system.
This makes your emails feel more personal.
You’re not just broadcasting messages — you’re talking to the right people at the right time.
Another thing about ConvertKit is the way emails look.
It doesn’t focus too much on fancy designs. Most emails are simple, clean, and text-based.
This is actually intentional.
Simple emails:
Feel more personal
Look like normal messages
Often get better open rates
Automation is also strong, but it is designed in a way that creators can understand without stress.
You can build flows like:
Someone subscribes → send welcome series
Someone clicks a topic → send related content
Someone buys → stop promo emails
However, ConvertKit is not built for heavy ecommerce or complex marketing systems. It shines more in content-driven businesses.
Pros
Perfect for bloggers and content creators
Strong tagging system for organizing audience
Simple and clean email style that feels personal
Easy-to-understand automation
Good for building long-term audience relationships
Cons
Limited design options for emails
Not ideal for advanced ecommerce marketing
Can be expensive as your list grows
Fewer features compared to all-in-one platforms
4. GetResponse – Deep Practical Understanding
GetResponse is designed for people who want everything in one place.
Instead of using separate tools for emails, landing pages, and funnels, GetResponse combines everything into a single system.
This makes it very useful for businesses that want to build and manage complete marketing systems without switching between platforms.
With GetResponse, you can:
Create landing pages
Build sales funnels
Host webinars
Send email campaigns
All from one dashboard.
Let’s break that down in a simple way.
If you want to run a campaign, you can:
Create a landing page
Collect emails
Send automated emails
Guide users into a sales funnel
Everything connects smoothly.
This reduces stress and saves time because you are not trying to connect different tools together.
Another strong part of GetResponse is its visual funnel builder.
You can literally see how your marketing process flows:
From signup
To email
To offer
To conversion
This makes it easier to understand what is working and what is not.
It also includes webinar tools, which is something many email platforms don’t offer.
This is useful if you:
Teach
Sell courses
Run live sessions
However, because GetResponse tries to do many things, it may feel a bit heavy at first.
Beginners might need some time to understand how everything connects.
Pros
All-in-one platform (email, funnels, landing pages, webinars)
Saves cost of using multiple tools
Strong funnel and campaign building system
Good for businesses and marketers
Useful for selling products or services
Cons
Can feel complex for beginners
Interface may take time to learn
Some features are locked behind higher plans
Not as simple as beginner-focused tools
5. ActiveCampaign – Deep Practical Understanding
ActiveCampaign is where email marketing becomes very serious.
This tool is not just about sending emails — it is about understanding and controlling customer behavior at a deep level.
If Mailchimp is simple, and Brevo is cost-focused, then ActiveCampaign is power-focused.
Everything in ActiveCampaign is built around automation and data.
It tracks what users do in detail:
Which emails they open
Which links they click
What pages they visit
How often they engage
From this, you can build very advanced automation flows.
For example:
If a user clicks a link but doesn’t buy → send follow-up
If a user visits a page multiple times → send targeted offer
If a user becomes inactive → move them to re-engagement sequence
These are not simple automations. They are behavior-driven systems.
ActiveCampaign also includes a strong CRM system.
This means you can manage your customers like a proper sales pipeline:
Track leads
Move them through stages
Follow up based on actions
This is very useful for businesses that deal with clients, sales calls, or high-value products.
But here is the truth — ActiveCampaign is not beginner-friendly.
There is a learning curve.
If you don’t understand how automation works, it can feel confusing at first.
But once you understand it, the control it gives you is very powerful.
Pros
Very powerful automation system
Deep customer behavior tracking
Strong CRM integration
Highly customizable workflows
Great for serious businesses and scaling
Cons
Not beginner-friendly
Takes time to learn properly
Can be expensive for small users
Setup can feel overwhelming at first
6. MailerLite – Deep Practical Understanding
MailerLite is one of those tools that doesn’t try to impress you with too many features. Instead, it focuses on doing the basics very well.
The moment you enter MailerLite, you notice how clean everything looks. No confusion, no clutter. You can easily find where to create emails, manage your subscribers, and set up automation.
It is built for people who want something simple but still effective.
When you add subscribers, MailerLite allows you to organize them using groups and segments. This helps you send the right message to the right people without stress.
The email builder is straightforward. You can drag and drop elements, add images, text, buttons — everything is easy to control. It may not be as advanced as some bigger platforms, but it is more than enough for most users.
Automation is where MailerLite quietly performs well.
You can create simple flows like:
Someone joins your list → send welcome email
Someone clicks a link → send follow-up
Someone completes an action → move them to another group
It may not be extremely advanced, but it covers what most small businesses and bloggers need.
Another good thing is that MailerLite gives you useful features without forcing you into expensive plans too quickly. That makes it a strong option if you are just starting but still want something reliable.
Where it falls short is in advanced marketing setups. If you want very deep automation or complex funnels, you may outgrow it.
Pros
Very clean and easy-to-use interface
Quick setup, no technical stress
Good automation for basic to mid-level needs
Affordable pricing for beginners
Reliable for newsletters and simple campaigns
Cons
Limited advanced automation features
Fewer integrations compared to bigger tools
Design flexibility is not very deep
Not ideal for large or complex marketing systems
7. Amazon SES – Deep Practical Understanding
Amazon SES is a completely different kind of tool.
It is not designed for marketers. It is built for developers and systems.
If tools like Mailchimp are like ready-made shops, Amazon SES is like having raw materials to build your own system from scratch.
The biggest advantage of Amazon SES is cost.
It is extremely cheap compared to most email platforms, especially when you are sending a large number of emails.
But that low cost comes with responsibility.
Amazon SES does not give you:
Drag-and-drop email builders
Ready-made templates
Easy dashboards
Instead, it gives you the ability to send emails through servers and APIs.
This means:
You need to configure it yourself
You need to connect it to your app or system
You need to manage things like email formatting and delivery
Another important part is sender's reputation.
With Amazon SES, you are responsible for how your emails perform. If your emails are marked as spam, it affects your setup directly.
So you need to:
Verify your domain
Set up authentication (like SPF, DKIM)
Keep your email list clean
This is why it is not beginner-friendly.
However, for businesses that send:
Transactional emails
System notifications
Large-scale campaigns
Amazon SES becomes very powerful and cost-efficient.
Pros
Very low cost, especially at scale
Highly reliable infrastructure
Perfect for large systems and applications
Full control over email sending
Scales easily as your business grows
Cons
Not beginner-friendly at all
No visual email builder or templates
Requires technical setup and knowledge
No built-in marketing tools
You handle deliverability and configuration yourself
8. SendGrid – Deep Practical Understanding
SendGrid sits somewhere between developer tools and marketing platforms.
It is widely used by apps, websites, and SaaS platforms because of how well it handles transactional emails and system messages.
If you have ever received:
Password reset emails
Account verification emails
Payment confirmations
There is a high chance tools like SendGrid were used behind the scenes.
The main strength of SendGrid is its API system.
This allows developers to connect email sending directly into their applications.
For example:
A user signs up → SendGrid automatically sends a welcome email
A user resets password → email is sent instantly
A transaction happens → receipt is delivered
Everything happens in real time, without manual work.
SendGrid also supports bulk email campaigns, but its strongest use case is still application-based email sending.
Unlike Amazon SES, SendGrid provides a bit more structure.
It includes:
Some templates
Basic dashboard
Email activity tracking
So it is slightly easier to use than raw systems like SES, but still requires some technical understanding for full use.
Another advantage is its reliability and delivery speed. Emails are sent quickly and consistently, which is important for apps and services.
However, if you are a beginner looking for simple email marketing, SendGrid may not feel comfortable. It is better suited for platforms, developers, or growing tech businesses.
Pros
Excellent for transactional and system emails
Strong API for app integration
Reliable and fast email delivery
Scales well for SaaS and platforms
Includes basic templates and tracking
Cons
Not beginner-friendly for non-technical users
Limited marketing features compared to full platforms
Setup may require developer support
Interface is more functional than user-friendly
9. AWeber – Deep Practical Understanding
AWeber is what you use when you don’t want surprises.
It has been around for a long time, and because of that, it follows a very traditional email marketing structure.
Everything is list-based.
You create lists, add subscribers into those lists, and send emails to those lists. Simple.
But here is where it becomes important.
Because it uses a list system (instead of flexible tagging like newer tools), managing the same person across different campaigns can become repetitive.
For example:
One user joins two different forms
They may exist in two different lists
You may end up sending duplicate emails if you’re not careful
This is one of the main limitations compared to modern tools.
Now, where AWeber still performs well is deliverability consistency.
It has built strong trust over time with email providers. So your emails are less likely to land in spam if your setup is clean.
Automation is there, but it is sequence-based, not deeply behavior-driven.
You can do:
Welcome series
Time-based follow-ups
But not very complex logic like:
“If user clicks this AND visits this page → do this”
So AWeber works best when your marketing is linear, not complex.
Pros
Very stable and predictable platform
Strong inbox delivery reputation
Easy to understand list-based system
Good for simple campaigns and newsletters
Cons
List-based system can cause duplication issues
Limited behavior-based automation
Feels outdated compared to modern tools
Not efficient for complex segmentation
10. Moosend – Deep Practical Understanding
Moosend is one of those tools that looks simple at first, but becomes powerful when you start using it properly.
Its real strength is in automation + segmentation at a low cost.
When you add subscribers, Moosend allows you to track actions like:
Email opens
Click behavior
Website activity (if connected)
Now here is where it becomes useful.
You can build automation that reacts to those actions.
For example:
User clicks a product → send a targeted email
User visits a page but does nothing → send reminder
User buys → remove from promotion
This kind of flow is usually found in more expensive tools, but Moosend gives it at a lower price.
Another important feature is conditional logic inside automation.
This means your system is not just sending emails — it is making decisions.
Like:
If user is active → continue sequence
If user is inactive → switch path
That is how you start building smart campaigns.
However, Moosend still has limits.
It does not have a strong ecosystem. So when you want to connect it with many external tools, you may face restrictions.
Also, while automation is strong, the platform itself is not as polished or widely supported.
Pros
Strong automation for its price level
Supports behavior-based workflows
Good segmentation and targeting
Very cost-effective for growing businesses
Cons
Limited integrations
Smaller ecosystem and community
Interface is functional but not refined
May feel limited at very large scale
11. Constant Contact – Deep Practical Understanding
Constant Contact is built for one type of user:
Someone who just wants to send emails without thinking too much.
Everything is simplified on purpose.
But here is what you need to understand.
It removes complexity, but it also removes control.
When you create campaigns, you are mostly working with:
Basic templates
Simple contact lists
Straightforward sending
There is not much depth in terms of logic or behavior tracking.
So instead of building smart campaigns, you are mostly doing:
“Create → Send → Done”
This is not a bad thing, depending on your needs.
For example:
Local businesses
Small organizations
Events and announcements
This works perfectly.
But if you want to grow into advanced marketing, you will feel restricted quickly.
Automation exists, but it is minimal.
You won’t be able to build complex customer journeys or deep personalization.
So Constant Contact is more about comfort than power.
Pros
Very easy for non-technical users
Fast setup and campaign execution
Good support when you need help
Works well for basic communication
Cons
Very limited automation depth
Little control over advanced targeting
Not suitable for scaling marketing systems
Feels restrictive as your needs grow
12. HubSpot Email Marketing – Deep Practical Understanding
HubSpot is not just a tool — it is a full business engine.
Everything revolves around one thing:
The customer journey
When someone enters your system in HubSpot, they are tracked from start to finish.
Not just emails.
Everything.
When they visit your site
When they click something
When they respond
When they become a customer
All of this is stored inside the CRM.
Now, the email system is just one part of that bigger picture.
This means your emails are not random.
They are tied to where the person is in your business pipeline.
For example:
New lead → educational email
Interested lead → product-focused email
Customer → retention email
This level of control is what makes HubSpot powerful.
Automation is also deeply connected to this system.
You can create workflows that depend on:
User behavior
Sales stage
Interaction history
So your marketing becomes structured, not guesswork.
But here is the trade-off.
HubSpot is heavy.
It takes time to learn
It requires proper setup
And it becomes expensive as you scale
So it is not for casual users.
It is for businesses that are ready to build systems, not just send emails.
Pros
Deep integration between email, CRM, and sales
Full visibility of customer journey
Very powerful automation logic
Ideal for scaling and structured growth
Cons
Expensive at higher levels
Requires time and effort to set up properly
Too complex for simple use cases
Not beginner-friendly
13. Benchmark Email – Deep Practical Understanding
Benchmark Email is built for simplicity, but let’s be clear — it is simple by design, not by limitation alone.
It focuses on one thing:
Sending clean, well-structured emails without complications.
When you use Benchmark, you don’t deal with too many options.
You:
Pick a template
Edit your content
Send your campaign
That’s it.
This makes it very useful for users who don’t want to spend time learning systems.
But here is the deeper reality.
Benchmark does not focus much on data-driven marketing.
So things like:
Deep segmentation
Behavior tracking
Advanced automation
Are either limited or basic.
This means you are mostly doing broadcast emails, not smart targeting.
If your goal is just to stay in touch with your audience, it works fine.
But if your goal is to increase conversions through strategy, you may outgrow it.
Pros
Very simple and easy to use
Clean email design and delivery
Quick campaign setup
Good for newsletters and updates
Cons
Very limited automation capabilities
Weak behavioral targeting
Basic analytics
Not suitable for growth-focused marketing
14. Elastic Email – Deep Practical Understanding
Elastic Email is built for volume and control, not simplicity.
It sits between marketing tools and developer systems.
The main thing to understand is this:
It gives you power, but expects you to know what you’re doing.
Elastic Email allows you to send a very large number of emails at a low cost.
But beyond that, it also gives you control over:
Sending methods
API integration
Email delivery configuration
So you can use it in two ways:
As a marketing platform
As a backend email engine
This flexibility is what makes it valuable.
Now let’s go deeper.
Elastic Email gives you access to detailed delivery settings.
This means you can control:
How emails are sent
How fast they are sent
How your sender reputation behaves
This is important for high-volume sending.
Because at scale, deliverability is everything.
But here is the challenge.
You are more responsible.
Unlike beginner tools that guide you, Elastic Email expects you to:
Understand email infrastructure
Manage your sending reputation
Optimize your campaigns yourself
So while it is powerful, it is not forgiving.
Pros
Very strong for high-volume email sending
Affordable compared to many platforms
Flexible for both marketers and developers
Detailed control over email delivery
Cons
Requires technical understanding
Not beginner-friendly
Less polished interface
You handle more responsibility for deliverability
15. Mailgun – Deep Practical Understanding
Mailgun is not built for marketers. It is built for developers and systems that need emails to work perfectly every time.
If you’re running a platform, app, or any system where emails are triggered by user actions, Mailgun is one of the tools designed for that exact job.
Think about things like:
Account verification emails
Password reset emails
Payment receipts
System alerts
Mailgun handles these kinds of emails very well.
How Mailgun Actually Works
Mailgun is mainly API-driven.
This means instead of logging into a dashboard to send campaigns, you connect Mailgun directly to your application.
So when something happens in your system:
A user signs up → Mailgun sends email instantly
A user requests reset → Mailgun delivers message immediately
Everything is automatic and happens in real time.
What Makes Mailgun Different
The biggest strength of Mailgun is deliverability control and monitoring.
It doesn’t just send emails — it shows you what is happening behind the scenes.
You can see:
Whether emails were delivered
Whether they bounced
Whether they were opened
Whether they failed
This level of visibility is very important for serious systems.
It also gives you tools to protect your sender reputation, like:
Email validation (to avoid fake emails)
Spam filtering
Domain authentication setup
So instead of guessing, you are working with real data.
Sending at Scale
Mailgun is built for scale.
If you are sending:
Thousands
Hundreds of thousands
Or even millions of emails
Mailgun can handle it without breaking.
And unlike many marketing tools, it stays stable under heavy load.
Where Mailgun Fits Best
Mailgun is best when:
You are building a SaaS platform
You have a web app
You need reliable transactional emails
You have a developer or technical setup
It is not designed for:
Beginners
Bloggers
Simple newsletter sending
Marketing vs System Use (Important Difference)
Mailgun is not focused on:
Fancy email templates
Drag-and-drop builders
Campaign design
Instead, it focuses on:
Delivery, speed, and reliability
So if your goal is marketing design → this is not the best fit
If your goal is system email performance → this is excellent
Pros
Very strong for transactional emails
Reliable and fast delivery system
Deep tracking and monitoring tools
Good email validation and security features
Built for scaling applications
Cons
Not beginner-friendly
Requires technical setup and API knowledge
No visual email builder for marketing campaigns
Limited for traditional email marketing use
Needs proper configuration to perform well
Email Deliverability
This one is very important.
Because if your email does not enter inbox, everything you are doing is just waste.
Simple.
You can write the best message, design it well, even have a good offer…
If it goes to spam, nobody will see it.
What really affects it
Email systems are watching how people treat your emails.
They check things like:
Do people open your email?
Do they click anything?
Or they just ignore it?
Do they mark it as spam?
If many people ignore you or mark you as spam, your emails will start going to spam too.
Big mistake people make
Many people think:
👉 “Let me just get plenty emails (contacts)”
But that is wrong.
What matters is active people, not just plenty people.
If you have:
1,000 people that always open your email → very good
10,000 people that ignore you → very bad
Because low activity tells email systems that your messages are not important.
Another thing — consistency
If you send email today, then disappear for long, then come back again…
It affects your trust.
It’s better to send small emails regularly than to send big emails once in a while.
Simple truth
If your email is not entering inbox, nothing else matters
Email Automation
Automation is what makes your work easy.
Instead of sending emails by yourself every time, you set it once…
and it keeps working for you.
How it works
Something happens → email goes automatically.
Example:
Someone signs up → they receive welcome email
Someone clicks something → they receive another email
Someone buys → they stop seeing promo emails
You don’t touch anything. It just works.
Why this is powerful
Without automation:
You forget to send messages
You send late
You miss chances
With automation:
Everybody gets message at the right time
Your system works even when you are sleeping
You don’t stress yourself
Real understanding
Automation is like having someone working for you 24/7.
No break. No forgetting.
Simple truth
Automation is what turns email into real business tool
Email Segmentation
This one is very simple.
Not everybody on your list is the same.
What it means
You divide your people into groups.
Like:
New people
People that always read your emails
People that already bought something
Now you don’t talk to everybody the same way.
Why it matters
Imagine this:
You send “Buy now” message to someone that just joined today.
That person may not trust you yet.
But if you send:
“Welcome, let me show you how things work”
That makes more sense.
Same thing:
Active people → you can promote to them
Customers → you can upsell or support them
So one message cannot fit everybody.
What happens when you do it well
People open your emails more
People click more
People trust you more
And when this happens, your emails stop going to spam.
Simple truth
Right message to the right person = better results
Real Life Example
Let’s make it real.
My friend has a small Business he was managing
He was sending emails manually.
Before
Every time he wants to send message:
He copies emails
Sends one message to everybody
No system
What happened?
Emails were entering spam
He didn’t know who opened anything
Nobody was really responding
So even though he was sending emails… nothing was working.
After switching to Brevo
He didn’t just change tool. He changed how he was doing things.
First, he cleaned his list.
He removed people that were not active.
Then he set simple automation:
New person → welcome email
Interested person → follow-up
Buyer → different message
He also grouped people:
New users
Active readers
Customers
What changed
More people started opening emails
More people clicked
Emails stopped going to spam
He didn’t need to send manually again
And slowly…
Sales started increasing
Lesson
It was not magic.
It was:
Better deliverability
Automation
Segmentation
That’s what changed everything.
Comparison Table
Platform
Best For
Ease of Use
Pricing (Starting)
Power Level
Mailchimp
Beginners
Very Easy
From ~$13/month
Medium
Brevo
Budget Users
Easy
Free, then ~$9/month
High
ConvertKit
Creators
Easy
From ~$15/month
High
GetResponse
All-in-One Marketing
Moderate
From ~$19/month
High
ActiveCampaign
Advanced Automation
Moderate
From ~$29/month
Very High
MailerLite
Simplicity
Very Easy
Free, then ~$10/month
Medium
Amazon SES
Developers
Hard
~$0.10 per 1,000 emails
Very High
SendGrid
Apps & SaaS
Moderate
From ~$19.95/month
High
AWeber
Traditional Email
Easy
Free, then ~$12–$15/month
Medium
Moosend
Affordable Automation
Easy
From ~$7–$9/month
High
Constant Contact
Non-Tech Users
Very Easy
From ~$12/month
Medium
HubSpot Email
Growing Businesses
Moderate
Free, then ~$15+/month
Very High
Benchmark Email
Simple Campaigns
Very Easy
Free, then ~$13/month
Medium
Elastic Email
High Volume Sending
Moderate
~$15 for 50k emails
High
Mailgun
Developers / Systems
Hard
From ~$15/month
Very High
Common Mistakes People Make
Using Personal Email for Bulk Sending
This will get your account restricted quickly.
Buying Email Lists
This destroys your reputation and leads to spam complaints.
Ignoring Setup (SPF/DKIM)
Without proper setup, your emails won’t be trusted.
Sending Without Strategy
Just sending emails randomly doesn’t work.
Types of Email Services
Transactional Email Tools
Used for system emails like:
Password reset
Order confirmation
Marketing Email Tools
Used for:
Promotions
Newsletters
Hybrid Platforms
These combine everything in one system.
Summary Table
Category
Best Use Case
What It Means (Simple)
Providers
Beginner Tools
Easy setup
Very easy to use, no experience needed
Mailchimp, MailerLite, Constant Contact, Benchmark Email
Budget Tools
Low cost
Affordable but still powerful
Brevo, Moosend
Creator Tools
Audience growth
Best for building loyal audience
ConvertKit
All-in-One Tools
Everything in one place
Email + funnels + pages + marketing tools
GetResponse
Advanced Tools
Automation & scaling
Deep automation and smart workflows
ActiveCampaign, HubSpot
Traditional Tools
Simple & reliable
Old but stable email marketing style
AWeber
Developer Tools
Flexibility
Built for apps, APIs, and systems
Amazon SES, Mailgun, SendGrid
High Volume Tools
Bulk sending
Best for sending large number of emails
Elastic Email
Engagement Check
Let’s make this simple for you.
Ask yourself:
Are you just starting out?
Do you want automation to save time?
Do you prefer something simple, or something powerful?
There is no one perfect tool for everybody.
The right tool depends on where you are right now.
If you choose based on your current level, everything becomes easier.
My Conclusion
Bulk email is not just about sending messages.
It is about building something over time.
Trust
Relationship
Consistent communication
That is what makes people stay, listen, and eventually buy.
The platform you choose matters, but how you use it matters even more.
Start simple if you are new.
Don’t rush into complex tools you don’t understand yet.
As you grow, you can always upgrade.
When someone visits a website, what they see on the screen is the result of multiple technologies working together. Two of the most important technologies are HTML and CSS.
HTML builds the structure of the webpage, while CSS controls the design and appearance.
When beginners start learning web development, they often learn HTML first. After creating their first page, they quickly notice that the page looks very plain.
This is where CSS becomes important.
I remember the first time I created a simple webpage using only HTML. The content appeared correctly, but the page looked like a simple document — plain text, no colors, and no layout.
After adding CSS, everything changed. The headings looked bigger, the text spacing improved, and the page started to look like a real website.
Understanding how HTML and CSS work together is one of the most important steps in learning web development.
Understanding the Roles of HTML and CSS
HTML and CSS work like a team. Each one has a different job.
Technology
Role in a Website
HTML
Creates the structure of the page
CSS
Styles and designs the page
HTML defines things like:
• headings
• paragraphs
• images
• links
• lists
CSS controls things like:
• colors
• fonts
• spacing
• layout
• positioning
Visual Example of HTML and CSS Working Together
[Diagram: webpage structure created by HTML with CSS styling applied to headings, text, and layout]
HTML builds the content structure first.
CSS then styles that structure to make it visually appealing.
Basic Example of HTML and CSS on the Same Page
Here is a simple example showing how HTML and CSS can be combined inside one webpage.
<!DOCTYPE html>
<html>
<head>
<title>My Styled Webpage</title>
<style>
body{
background-color: #f4f4f4;
font-family: Arial, sans-serif;
}
h1{
color: darkblue;
text-align: center;
}
p{
color: #333;
font-size: 18px;
}
</style>
</head>
<body>
<h1>Welcome to My Website</h1>
<p>This webpage is styled using CSS.</p>
<p>HTML creates the structure while CSS controls the design.</p>
</body>
</html>
In this example:
• HTML creates the webpage structure.
• CSS inside the <style> section controls how the elements look.
What Happens When the Browser Loads This Page
[Diagram: browser reading HTML structure and applying CSS rules to render styled webpage]
When the browser opens this page, the following steps occur:
Step 1 — HTML is Loaded
The browser reads the HTML structure first.
Step 2 — CSS Rules Are Detected
The browser finds the CSS rules inside the <style> section.
Step 3 — Styles Are Applied
Each CSS rule is applied to matching HTML elements.
Step 4 — Final Webpage Appears
The browser displays the styled webpage.
This entire process happens extremely quickly.
Example: HTML Without CSS
[Diagram: webpage with plain text layout, no colors or styling]
If the same HTML page had no CSS, the webpage would look very simple:
• plain black text
• white background
• no layout control
• little spacing
Example: HTML With CSS
[Diagram: webpage with styled headings, colors, spacing and organized layout]
With CSS applied:
• headings become larger
• text colors improve readability
• spacing becomes comfortable
• layouts become organized
This is why CSS is essential for modern websites.
Using External CSS with HTML
Most professional websites do not write CSS directly inside HTML files. Instead, they store CSS in a separate file.
Example CSS file:
body{
background-color:#f2f2f2;
font-family: Arial;
}
h1{
color:darkgreen;
}
p{
font-size:18px;
color:#444;
}
The HTML file then connects to that CSS file.
<link rel="stylesheet" href="style.css">
This method has many advantages:
• cleaner HTML files
• easier website maintenance
• reusable styles across multiple pages
How Large Websites Use HTML and CSS
Modern websites often have many HTML pages, but they may use one central CSS file.
[Diagram: multiple HTML pages connected to a single CSS stylesheet]
For example:
HTML Page
Uses CSS File
home.html
style.css
about.html
style.css
contact.html
style.css
This keeps the design consistent across the entire website.
Common Beginner Mistakes When Combining HTML and CSS
When beginners first start combining HTML and CSS, they often run into small problems.
CSS File Not Linked Properly
If the CSS file is not connected correctly, the page will appear without styling.
Always check the file path.
Incorrect Selectors
If CSS selectors do not match HTML elements, the styles will not apply.
Example mistake:
Trying to style .title when the HTML element does not use that class.
Overwriting Styles Accidentally
Sometimes multiple CSS rules affect the same element. Because CSS is cascading, later rules may override earlier ones.
Helpful Tips for Beginners
If you are learning HTML and CSS together, these tips will help you progress faster.
• practice creating simple webpages
• use browser developer tools to inspect styles
• experiment with colors and layouts
• keep HTML structure clean and organized
• separate CSS into external files when possible
With consistent practice, understanding how HTML and CSS work together becomes much easier.
My Conclusion
HTML and CSS are the two fundamental technologies used to build webpages.
HTML provides the structure by defining elements such as headings, paragraphs, images, and links.
CSS enhances that structure by controlling the visual design, including colors, fonts, spacing, and layout.
Together, HTML and CSS form the foundation of every modern website. Learning how they work together allows beginners to move from simple webpages to fully designed and professional-looking websites.
When most people start learning web development, the first thing they usually learn is HTML. HTML helps you create the structure of a webpage — headings, paragraphs, images, and links.
But something quickly becomes obvious.
The webpage looks very plain.
The text is black, the background is white, and everything appears stacked together with almost no spacing. It works, but it does not look like a modern website.
I remember the first time I created a small webpage using only HTML. It technically worked, but when I opened it in the browser it looked like a simple document rather than a real website.
Then I discovered CSS.
After adding just a few lines of CSS, the page suddenly had colors, spacing, and a clean layout. It started to look like a real website.
That is when I understood something important:
HTML builds the structure of a webpage, but CSS is what gives it design and style.
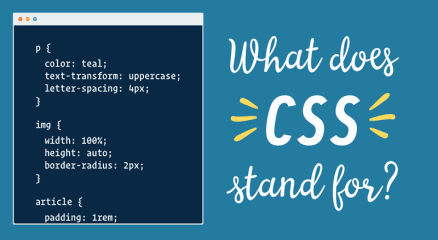
What CSS Means
CSS stands for Cascading Style Sheets.
CSS is the language used to style and design webpages.
While HTML describes the structure of the page, CSS controls how that structure appears to visitors.
CSS can control many visual aspects of a website, including:
• text colors
• font styles
• spacing between elements
• background colors and images
• page layout
• responsive design for mobile devices
• animations and visual effects
Without CSS, most websites would look like simple text documents.
A Simple Way to Understand HTML and CSS
Think of building a website like constructing a house.
Part of the House
Website Equivalent
Building structure
HTML
Interior and exterior design
CSS
Electricity and automation
JavaScript
HTML builds the walls, rooms, and foundation.
CSS decides the paint color, furniture placement, lighting style, and overall appearance.
What a Website Looks Like Without CSS
[Diagram: simple webpage showing plain text, no spacing, no colors, basic layout]
If a webpage used only HTML:
• all text would look similar
• there would be little spacing
• layouts would be very basic
• the page would not look visually appealing
This is why CSS is necessary for modern websites.
What a Website Looks Like With CSS
[Diagram: webpage layout with styled headings, colors, spacing, navigation bar and sections]
When CSS is applied:
• headings become visually clear
• spacing improves readability
• layouts become organized
• colors create a professional design
This transformation is what CSS provides.
How CSS Works Behind the Scenes
When a visitor opens a webpage, the browser must combine several resources to display the page correctly.
[Diagram: browser loading HTML file then applying CSS rules to render a styled webpage]
Here is the simplified process:
Step 1: Browser Requests the Webpage
The browser sends a request to the web server for the webpage.
Step 2: Server Sends HTML
The server returns the HTML file that contains the structure of the webpage.
Step 3: Browser Finds CSS Files
Inside the HTML file, there may be links to CSS files.
The browser loads these CSS files.
Step 4: CSS Rules Are Applied
The browser applies CSS rules to the HTML elements.
Each rule determines how elements should look.
Step 5: Final Page is Rendered
The browser combines everything and displays the final styled webpage.
This entire process usually takes only a fraction of a second.
Understanding CSS Rules
CSS works using selectors and properties.
A basic CSS rule looks like this:
p {
color: blue;
font-size: 18px;
}
Let’s break it down.
Selector
p
This tells the browser the rule applies to paragraph elements.
Property
color
font-size
These are styling properties.
Value
blue
18px
These define how the property should behave.
This rule means:
All paragraphs should display blue text with a font size of 18 pixels.
Where CSS Can Be Added
CSS can be added to webpages in three different ways.
Inline CSS
Inline CSS is written directly inside an HTML element.
<p
style="color:red;">Hello World
</p>
This method is usually used for small changes but is not ideal for large websites.
Internal CSS
Internal CSS is written inside the HTML document itself.
<style>
p {
color: green;
}
</style>
This applies styles only within that webpage.
External CSS
External CSS is the most common method.
Styles are written inside a separate file.
Example file:
style.css
p {
color: purple;
font-size: 18px;
}
The HTML file connects to the stylesheet.
<link rel="stylesheet" href="style.css">
This approach keeps design separate from structure and makes websites easier to maintain.
Important CSS Properties Beginners Should Know
Here are some commonly used CSS properties.
Property
Purpose
color
Changes text color
background-color
Sets background color
font-size
Adjusts text size
margin
Adds space outside elements
padding
Adds space inside elements
border
Creates borders
text-align
Aligns text
width
Controls element width
height
Controls element height
Learning these properties helps beginners quickly improve webpage design.
Understanding CSS Layout
CSS also controls how elements are arranged on a page.
[Diagram: website layout showing header, navigation bar, content section, sidebar and footer]
Modern CSS uses layout systems such as:
Flexbox
Flexbox helps align items in rows or columns.
It is useful for navigation bars and responsive designs.
CSS Grid
CSS Grid helps create complex layouts with rows and columns.
It is commonly used for full webpage structures.
Positioning
CSS also allows precise control over where elements appear using positioning rules.
Why CSS is Important for Websites
CSS plays a major role in modern web development.
It helps with:
• visual design
• consistent layouts
• responsive design for mobile devices
• faster website maintenance
• improved user experience
Without CSS, websites would be difficult to navigate and visually unappealing.
Common CSS Mistakes Beginners Make
When beginners start learning CSS, they often encounter small problems.
Forgetting Measurement Units
font-size: 20px
CSS requires units such as px, em, or rem.
Conflicting Styles
Sometimes multiple CSS rules affect the same element.
The browser applies rules based on the cascading system, which can cause confusion if not understood.
Incorrect File Linking
If the CSS file is not linked correctly in the HTML file, the styles will not load.
Always verify the file path.
Tips for Learning CSS Faster
If you want to improve quickly with CSS, these practices help a lot.
• practice building small layouts
• experiment with colors and fonts
• inspect websites using browser developer tools
• learn Flexbox and Grid early
• create simple webpage designs
CSS becomes easier the more you experiment with it.
My Conclusion
CSS is the language that gives websites their visual design.
While HTML creates the structure of a webpage, CSS controls how that structure appears to visitors by defining colors, layouts, fonts, and spacing.
Understanding CSS is essential for anyone who wants to build modern, visually appealing websites.
If you have ever thought about building a website, the first technology you will meet is HTML.
HTML is the foundation of almost every website on the internet. Every page you visit — whether it is a blog, online store, or news site — starts with HTML.
When I first tried creating a website many years ago, I expected something complicated. I imagined learning programming would take months before I could even see a simple webpage.
But the truth surprised me.
I opened a simple text editor, wrote a few lines of HTML, saved the file, and when I opened it in my browser, my first webpage appeared.
That moment made me realize something important: HTML is actually very beginner-friendly.
In this guide, you will learn what HTML is, how it works, and why it is the backbone of the web.
What HTML Means
HTML stands for HyperText Markup Language.
It is the standard language used to structure and display content on web pages.
HTML does not function like programming languages such as Python or JavaScript. Instead, it tells the browser how content should be organized and displayed.
For example, HTML tells the browser:
• This is a heading
• This is a paragraph
• This is an image
• This is a link
Without HTML, a webpage would just be plain text with no structure.
What HTML Does on a Webpage
HTML creates the structure of a webpage.
Think of it like the skeleton of a human body.
Website Component
Role
HTML
Structure
CSS
Design and styling
JavaScript
Interactivity
HTML organizes the content.
CSS makes it look beautiful.
JavaScript makes it interactive.
Together, these three technologies power modern websites.
A Simple HTML Structure
Every HTML page follows a basic structure.
<!DOCTYPE html>
<html>
<head>
<title>My First Webpage</title>
</head>
<body>
<h1>Hello World</h1>
<p>This is my first webpage.</p>
</body>
</html>
Let’s break down what this means.
DOCTYPE
This tells the browser that the document is an HTML5 page.
HTML Tag
The <html> tag wraps the entire webpage.
Everything inside it belongs to the webpage.
Head Section
The <head> contains information about the page such as:
• page title
• meta tags
• styles
• scripts
This part is not directly visible on the webpage.
Body Section
The <body> contains the content visitors actually see.
Examples include:
• headings
• paragraphs
• images
• links
• videos
How HTML Works Behind the Scenes
When someone opens a website, several things happen.
[Diagram: browser requesting HTML page from a web server]
Step-by-step process:
A user enters a website address in the browser.
The browser sends a request to the web server.
The server sends the HTML file.
The browser reads the HTML code.
The browser converts the HTML into a visual webpage.
The process happens in seconds.
Understanding HTML Tags
HTML works using tags.
Tags tell the browser how to display content.
Most HTML tags follow this structure:
<tagname>Content</tagname>
Example:
<p>This is a paragraph</p>
Here:
<p> means paragraph.
The closing tag </p> tells the browser where the paragraph ends.
Common HTML Tags Beginners Should Know
Here are some of the most commonly used HTML tags.
HTML Tag
Purpose
<h1>
Main heading
<h2>
Subheading
<p>
Paragraph
<a>
Link
<img>
Image
<ul>
Unordered list
<li>
List item
<div>
Container for layout
Example of a link:
<a href="https://example.com">Visit Website</a>
Example of an image:
<img src="image.jpg" alt="Example Image">
How a Simple Webpage Looks in HTML
Here is a small example of a basic webpage.
<!DOCTYPE html>
<html>
<head>
<title>My Blog</title>
</head>
<body>
<h1>Welcome to My Blog</h1>
<p>This is my first blog post.</p>
<p>I am learning HTML step by step.</p>
</body>
</html>
When opened in a browser, this code becomes a simple webpage with a title and two paragraphs.
Why HTML is Important
HTML is essential because it provides the foundation of the web.
Without HTML:
• browsers cannot structure content
• websites cannot display properly
• search engines cannot understand webpages
HTML also helps with:
• SEO structure
• accessibility
• webpage organization
Every web developer starts by learning HTM
Common Beginner Mistakes in HTML
When beginners start learning HTML, they often encounter small mistakes.
Here are a few common ones.
Forgetting Closing Tags
Example mistake:
<p>This is a paragraph </p>
Correct version:
<p>This is a paragraph</p>
Incorrect Tag Nesting
Wrong example:
<p><b>Text</p></b>
Correct version:
<p><b>Text</b></p>
Missing Attributes
Images need a source attribute.
Example:
<img src="photo.jpg">
Tips for Learning HTML Faster
If you are just starting, these tips will help.
• Practice by building small pages
• Use browser developer tools
• Experiment with different tags
• View the source code of websites
• Learn HTML together with CSS
HTML becomes easy once you start practicing regularly
My Conclusion
HTML is the basic language used to create and structure webpages.
It tells browsers how to display content such as headings, paragraphs, images, and links.
Although it may look technical at first, HTML is actually one of the easiest technologies to learn in web development.
Once you understand HTML, you take the first step toward building websites and understanding how the internet works behind the scenes.
INTRODUCTION
You might be wondering right now:
What exactly is a domain name, and why is it so important?
Have you ever typed a website name into your browser and instantly landed on a page, without thinking about what actually happens behind the scenes?
A domain name is one of the most important parts of any website. If you have ever typed something like google.com, facebook.com, or youtube.com into your browser, then you have already used a domain name.
When I first started learning about websites, I kept hearing the term “domain name,” but I didn’t really understand what it meant. I even made the mistake of thinking it was the same as hosting, and that confusion slowed me down a lot.
But many beginners building their first website do not clearly understand what a domain name really is or how it works.
On OsasBlog, we break things down in a simple way so that even someone completely new to websites can understand. In this guide, you will learn what a domain name is, how it works behind the scenes, and why every website needs one, so you not only understand it, but also see how it fits into the bigger picture of how the internet works.
What Is a Domain Name in Simple Terms?
A domain name is the address of a website that people use to access it on the internet.
Instead of remembering complex numbers (IP addresses), you simply type a name like:
osasblog.com
That name directs your browser to the correct website.
WHAT YOU WILL LEARN IN THIS GUIDE
What a domain name is
Why domain names exist
How domain names work behind the scenes
The parts and types of domain names
Differences between domain and hosting
How domain names affect your website success
Common mistakes beginners make
WHAT IS A DOMAIN NAME?
Simple Definition
A domain name is a human-friendly address used to identify a website on the internet.
It acts as a shortcut that replaces a long numerical IP address.
Deeper Explanation
Every website on the internet is stored on a server, and each server has a unique IP address.
These IP addresses look like this:
192.168.0.1
Now imagine trying to remember numbers like that for every website you visit.
That would be difficult, slow, and impractical.
So domain names were introduced to make navigation simple.
Simple Analogy
Think of a domain name like a contact name on your phone.
Instead of memorizing someone’s phone number, you save their name.
When you want to call them, you simply tap the name.
That’s exactly how domain names work.
WHY DOMAIN NAMES EXIST
The Core Problem They Solve
The internet was originally built for machines, not humans.
Machines understand numbers very well, but humans don’t.
So domain names solve one major problem:
Making the internet easy for humans to use
Engagement Hook
Have you ever tried remembering even three phone numbers without saving them?
Now imagine remembering thousands of IP addresses.
That’s why domain names are essential.
HOW DOMAIN NAMES WORK
Behind the Scenes Breakdown
When you type a domain name into your browser:
Your browser sends a request
The request goes to the DNS system
DNS translates the domain into an IP address
The request is sent to a web server
The server responds with website data
Your browser displays the website
Why This Happens So Fast
This entire process takes milliseconds because:
DNS systems are optimized
Servers respond quickly
Browsers cache information
PARTS OF A DOMAIN NAME
Let’s break this down using:
osasblog.com
Structure Explanation
osasblog → Second-level domain (your unique name)
.com → Top-level domain (extension)
Types of Domain Extensions
Type
Example
Purpose
Generic
.com, .net
General use
Organization
.org
Non-profits
Country
.ng, .uk
Location-based
Specialized
.tech, .store
Niche usage
TYPES OF DOMAIN NAMES
Top-Level Domain (TLD)
The extension part like .com or .org
Second-Level Domain
The main name you choose
Subdomain
Example: blog.osasblog.com
Why This Matters
Understanding types helps you:
Choose better domain names
Structure your website properly
Scale your content
DOMAIN NAME VS HOSTING
Many beginners confuse these two.
Comparison Table
Feature
Domain Name
Hosting
Role
Address
Storage
Function
Directs users
Stores website
Visibility
Public
Behind the scenes
Example
osasblog.com
Server
Simple Analogy
Domain = Address
Hosting = House
You need both for your website to work.
RELATED CONCEPTS
To fully understand domain names, you should also understand:
DNS (Domain Name System)
The system that translates domain names into IP addresses
Nameservers
They control where your domain points
You can also learn how nameservers work in another detailed guide on OsasBlog.
Web Hosting
Where your website files are stored
You can also learn about web hosting and how it works in another beginner-friendly guide on this blog.
HOW DOMAIN NAMES AFFECT SEO AND BRANDING
Your domain name can influence your website success.
Branding Impact
A clean domain name:
Builds trust
Is easy to remember
Looks professional
SEO Impact
While domain names alone do not guarantee ranking, they can:
Improve click-through rate
Help users remember your site
Strengthen brand signals
DOMAIN NAME LIFECYCLE
A domain name goes through stages:
Registration
You purchase the domain
Active Period
Domain is working normally
Expiration
Domain stops working if not renewed
Grace Period
You can still renew
Deletion
Domain becomes available again
Why This Matters
If you forget to renew your domain, you can lose it completely.
REAL LIFE EXAMPLE
Imagine opening a business shop.
Your domain name is your shop name and address.
If people can’t remember it or find it, they won’t visit.
That’s why choosing and maintaining a domain name is very important.
COMMON MISTAKES BEGINNERS MAKE
Confusing Domain and Hosting
They are different but work together
Choosing Long Names
Hard to remember and type
Using Complicated Words
Reduces trust and clarity
Forgetting Renewal
Can lose your domain
QUICK SUMMARY TABLE
Concept
Meaning
Domain Name
Website address
IP Address
Numerical location
DNS
Translator
Hosting
Website storage
ENGAGEMENT CHECK
At this point, ask yourself:
Do you now understand how a domain name works and why it exists?
If yes, then you now understand a core part of how the internet works.
MY FINAL THOUGHT
A domain name may seem like a small part of a website, but it plays a very important role.
It connects users to your content, builds your brand, and makes the internet easier to use.
Now that you understand what a domain name is and how it works, you are no longer just browsing the internet — you understand part of its foundation.
And that is a powerful step forward.
When people first start building websites, they often hear the term name server but have no idea what it really means. It sounds technical and complicated, yet it is actually one of the simplest parts of how the internet works.
A name server plays a very important role in making sure visitors can find your website online. Without it, typing a website address in a browser would not lead anywhere.
Let me explain it in a simple way.
Some years ago, when I bought my first domain name, I was excited to launch a website. I registered the domain and bought hosting. After that, the hosting company sent me something like this:
ns1.myhosting.com
ns2.myhosting.com
They told me to update my name servers.
At that time I had no idea what that meant.
I logged into my domain panel and saw a section called Nameservers. I replaced the existing values with the ones from my hosting company.
After a few hours, my website suddenly started loading online.
That moment helped me understand something very important:
Name servers are the bridge between your domain name and your website hosting.
What Is a Name Server?
A name server is a server that helps translate a domain name into the IP address of a web server.
Humans prefer names like:
google.com
facebook.com
osasblog.com
But computers communicate using numbers called IP addresses, like this:
142.250.190.78
A name server helps convert the domain name into the correct IP address so the browser can find the website.
A Simple Way to Understand It
Think of the internet like a large city.
Item
Real World Example
Internet Equivalent
Person’s name
John Smith
Domain name
House address
24 Park Avenue
IP address
Phone directory
Address lookup
Name server
If someone asks:
Where does John Smith live?
You check the directory to find the address.
That directory is similar to what a name server does on the internet.
What Happens When You Type a Website Address
When you type a website like:
www.osasblog.com
Many small processes happen behind the scenes.
Here is a simplified version of what happens.
Step 1 — Your Browser Makes a Request
Your browser asks:
Where is osasblog.com located?
Step 2 — The Request Goes to a DNS Resolver
Your internet provider checks its DNS cache to see if it already knows the address.
Step 3 — It Contacts the Name Server
If the address is not cached, the system asks the authoritative name server for the domain.
Step 4 — The Name Server Responds
The name server replies with the IP address of the web server.
Step 5 — The Website Loads
Your browser connects to that IP address and loads the website.
Behind the Scenes Example
Here is a simplified idea of how DNS records may look on a server.
Domain: yoursite.com A Record yoursite.com -> 192.328.1.10 CNAME Record www.yoursite.com -> yoursite.com MX Record mail.yoursite.com -> 192.328.1.10
The name server stores these records and tells browsers where to go.
Types of Name Servers
There are two main types.
Authoritative Name Server
This server holds the actual DNS records for the domain.
It gives the final answer when someone asks where the domain is located.
Recursive Name Server
This server acts like a middleman.
It receives requests from users and searches for the correct authoritative server.
Example
Type
What It Does
Recursive DNS
Finds the answer
Authoritative DNS
Provides the final answer
What Do Name Servers Look Like?
Most hosting companies give name servers like this:
ns1.hostingcompany.com
ns2.hostingcompany.com
Sometimes you may see:
ns1.cloudflare.com
ns2.cloudflare.com
Each name server contains DNS records that point your domain to your hosting server.
Why Websites Use Multiple Name Servers
You will often see two or more name servers for a domain.
Example:
ns1.host.com
ns2.host.com
This is done for reliability.
If one server fails, the other one can still respond.
It keeps websites accessible even if a server goes down.
Where Do You Change Name Servers
Name servers are changed in your domain registrar dashboard.
Common places include:
Namecheap
GoDaddy
Cloudflare
Porkbun
Dynadot
Zenoxcloud
Inside the domain settings, you will usually see a section called:
Nameservers
You simply replace the existing ones with the new ones from your hosting provider.
Example of Updating Name Servers
Old:
ns1.oldhost.com
ns2.oldhost.com
New:
ns1.newhost.com
ns2.newhost.com
Once updated, the change starts spreading across the internet.
What Is DNS Propagation
After changing name servers, the internet needs time to update.
This process is called DNS propagation.
It usually takes:
Time
What Happens
0 – 1 hour
Some networks update
6 – 24 hours
Most networks update
Up to 48 hours
Global update complete
During this period, some people may see the old site, while others see the new site.
Name Server vs DNS Records
Many beginners confuse these two.
Here is the difference.
Feature
Name Server
DNS Record
Role
Manages DNS records
Specific instructions
Location
On DNS servers
Inside DNS zone
Example
ns1.host.com
A record, MX record
Real Example Using a Blog
Let us imagine you run OsasBlog.
Your setup might look like this:
Domain: osasblog.com
Registrar: Zenoxcloud
Hosting: VPS server
You change the domain name servers to:
ns1.yourvpshost.com
ns2.yourvpshost.com
Inside those servers, the DNS record may point to:
192.168.100.25
Now when someone visits:
osasblog.com
The name server tells the browser:
The website is located at 192.168.100.25
Then the site loads.
Common Problems With Name Servers
Beginners often face issues like:
Wrong Name Server
If the nameserver is incorrect, the website will not load.
DNS Not Fully Propagated
After changes, some users may still see the old version of the site.
Missing DNS Records
Even if the name server is correct, the site may not load if the A record is missing.
How to Check Name Servers
You can check domain name servers using tools like:
WHOIS lookup
DNS checker tools
Terminal commands
Example command:
<pre><code> nslookup osasblog.com </code></pre>
This will display the DNS information for the domain.
Why Name Servers Are So Important
Without name servers:
Domains cannot connect to hosting
Websites cannot load
Emails cannot work
Subdomains cannot function
They act as the traffic controller of the internet.
I Will Conclude Here
A name server is a system that maps a domain name to the server where a website is hosted.
It helps translate human-friendly website names into numerical IP addresses that computers understand.
When someone types a website address in a browser, the name server helps locate the correct server where that website lives.
Once you understand this simple idea, managing domains, hosting, and DNS becomes much easier when building websites or running a blog like OsasBlog.
When someone types your website address into their browser, it may feel like the page appears instantly. In reality, several technical processes are happening behind the scenes within just a few seconds.
Many website owners publish content every day without thinking about what actually happens when a visitor opens their site.
I remember the first time I looked into this while troubleshooting a slow website. At the time, I assumed the browser simply loaded the website files directly. After digging deeper, I discovered that a lot more happens before the page finally appears on the screen.
Understanding this process can help website owners improve speed, fix errors, and better understand how the internet works.
Let’s walk through what actually happens step by step.
Step One: The Visitor Enters Your Website Address
The process begins when a visitor types your website address into their browser.
For example:
yourwebsite.com
The browser does not immediately know where that website is located. It only knows the name that was entered.
Before the website can load, the browser must first discover which server stores the website files.
This is where the Domain Name System comes into play.
Step Two: DNS Finds the Website Server
The Domain Name System, often called DNS, works like a phone directory for the internet.
Every website is stored on a server that has a unique IP address. An IP address looks something like this:
192.168.1.1
Humans prefer remembering domain names instead of long numbers, so DNS translates the domain name into the correct server address.
When someone visits your website, the browser sends a request to DNS servers asking:
“Where is this website located?”
The DNS system then responds with the server’s IP address.
Only after this step can the browser find the correct server.
Step Three: The Browser Sends a Request to the Server
Once the browser knows the server’s location, it sends a request to that server asking for the website files.
This request is called an HTTP request.
The server receives the request and begins preparing the website data that needs to be sent back to the visitor.
Depending on how the website is built, the server may need to gather several elements, including:
• HTML page structure
• images
• CSS design files
• JavaScript scripts
• database content
All of these components work together to build the website page.
Step Four: The Server Processes the Website
At this stage, the server begins assembling the website content.
For simple websites, the server may only need to send basic HTML files.
However, many modern websites use databases and applications. This means the server must first retrieve data before building the page.
For example, when someone visits a blog post, the server may need to retrieve:
• the article text
• the author name
• comments
• images
• related posts
All of this information is gathered before the page can be delivered to the visitor.
Step Five: The Server Sends Website Files to the Browser
After the server prepares the website content, it sends the files back to the visitor’s browser.
These files usually include:
File Type
Purpose
HTML
Structure of the webpage
CSS
Visual design and layout
JavaScript
Interactive features
Images
Visual content
The browser then begins building the page using these files.
Step Six: The Browser Renders the Website
Once the files arrive, the browser starts rendering the webpage.
Rendering means the browser interprets the code and converts it into the visual page that users see.
The browser will:
• arrange the page layout
• apply colors and styles
• load images
• execute scripts
Within seconds, the complete website appears on the visitor’s screen.
A Real Example From Experience
There was a time when a website I managed suddenly became very slow. Visitors complained that pages took several seconds to load.
At first, we assumed the problem was the website design.
After checking the system, the real issue turned out to be a slow server response. The server was taking too long to process requests and send files back to the browser.
Once we upgraded the hosting and optimized the database, the loading speed improved immediately.
That experience showed how important the entire request process is when someone visits a website.
Why Website Speed Depends on This Process
Every step in the process affects how fast a website loads.
If any stage becomes slow, the entire website can feel slow to visitors.
Common causes of slow websites include:
• slow DNS lookup
• overloaded servers
• large images
• inefficient database queries
• poor hosting infrastructure
Improving these factors can significantly improve website performance.
How Modern Websites Improve Loading Speed
Many websites today use additional technologies to speed up this process.
These include:
• caching systems
• content delivery networks
• optimized servers
• faster hosting infrastructure
These tools reduce the time required to process requests and deliver content.
RoundUP
When someone visits your website, a complex series of steps happens behind the scenes within just a few seconds.
The browser must locate the server, request the website files, receive the content, and finally render the page for the visitor.
Although this process happens very quickly, understanding how it works can help website owners build faster and more reliable websites.
The next time you open a website, remember that several systems are working together instantly to deliver that page to your screen.
Thank you for choosing OsasBlog.
Choosing a hosting plan is one of the first important decisions when starting a website. Many beginners see options like shared hosting and cloud hosting but struggle to decide which one is actually right for their project.
When I helped a friend launch his first website, we faced the same situation. He wanted something affordable, but he was also worried about the website slowing down if traffic increased.
At the time, the easiest option was shared hosting. It was simple, affordable, and required almost no technical setup. For several months everything worked perfectly.
But later, when one of his blog posts started gaining attention online, the website began experiencing slow loading times during peak hours.
That moment made it clear that choosing the right hosting plan depends heavily on the size and growth of your website.
This guide will help you understand when shared hosting is the right choice and when cloud hosting makes more sense.
When Shared Hosting Is the Right Choice
Shared hosting is usually the best starting point for most new websites.
With this type of hosting, multiple websites share the same server resources such as CPU power, memory, and storage. Because the server cost is shared among many users, the hosting plans are very affordable.
For beginners who are just launching a blog, portfolio, or small business website, shared hosting often provides everything needed to get started.
Many shared hosting plans also include helpful tools such as:
• website control panels
• email hosting
• easy WordPress installation
• automated backups
These tools make it possible for beginners to manage a website without technical knowledge.
For example, a personal blog receiving a few hundred visitors per day can run comfortably on shared hosting without any problems.
Situations Where Shared Hosting Works Best
Shared hosting is usually the right choice if your website falls into one of these categories.
• personal blogs
• portfolio websites
• small company websites
• informational websites
• beginner projects
These types of websites typically have moderate traffic levels and do not require large server resources.
Another advantage is cost. Shared hosting plans often start at only a few dollars per month, making them ideal for people who want to launch a website with a small budget.
When Cloud Hosting Becomes the Better Option
Cloud hosting becomes a better option when a website begins growing quickly or expects unpredictable traffic.
Unlike shared hosting, cloud hosting does not rely on a single server. Instead, it uses a network of connected servers working together.
This means resources can increase automatically when traffic grows.
I once worked with a website that published technology news. Most days the traffic was moderate, but occasionally a story would attract thousands of readers in a short time.
When that happened, shared hosting struggled to handle the sudden traffic surge.
After migrating the website to cloud hosting, those traffic spikes were no longer a problem. The system automatically adjusted resources when the website received large numbers of visitors.
That flexibility is one of the biggest strengths of cloud hosting.
Situations Where Cloud Hosting Is the Right Choice
Cloud hosting is often a better choice when a website requires more stability and flexibility.
Examples include:
• growing online stores
• large blogs with increasing traffic
• SaaS applications
• platforms expecting viral traffic
• websites serving international audiences
Because cloud hosting uses multiple servers, it is also more reliable in case one server experiences a failure.
Cost Comparison Between Shared and Cloud Hosting
One important difference between these hosting types is cost.
Shared hosting is typically the cheapest option available, while cloud hosting costs more because it provides greater resources and scalability.
Hosting Type
Typical Monthly Cost
Shared Hosting
$3 – $10
Cloud Hosting
$20 – $100+
While cloud hosting is more expensive, the extra performance and reliability can be worth it for growing websites.
Performance and Reliability Differences
Another major difference between shared hosting and cloud hosting is how they handle performance.
Feature
Shared Hosting
Cloud Hosting
Server Setup
Single shared server
Network of servers
Traffic Handling
Limited
Highly scalable
Reliability
Standard
Very high
Best For
Small websites
Growing platforms
Shared hosting works well for stable websites with predictable traffic. Cloud hosting is better for websites that experience sudden traffic increases.
How to Decide Which Hosting You Should Choose
If you are launching a brand-new website, shared hosting is usually the smartest starting point.
It allows you to build your website, publish content, and grow your audience without spending much money.
However, if your website is already attracting significant traffic or you expect rapid growth, cloud hosting can provide the stability and performance needed to support that growth.
Many successful websites start with shared hosting and later move to cloud hosting once their traffic increases.
This gradual upgrade approach helps control costs while ensuring the website remains stable.
Final Thoughts
Shared hosting and cloud hosting both serve important roles in website hosting.
Shared hosting offers an affordable and simple way for beginners to launch websites quickly. Cloud hosting provides stronger infrastructure for websites that require scalability and higher reliability.
Choosing the right option depends on your website’s current needs and future growth plans.
Starting with the right hosting plan can save time, reduce technical problems, and ensure your website performs well as your audience grows.
Thank you for choosing OsasBlog.
Introduction
Let me tell you a short, real story.
A few months ago, I met someone who had just started a small online shop. His products were good. His website looked clean and professional. People were even visiting his site.
But there was one big problem—he had no proper way to stay in touch with those visitors after they left.
So he did what most people do at the beginning. He started sending emails using his personal Gmail account.
At first, everything looked fine.
He sent 20 emails. Then 50. Then 100.
Then things started going wrong.
Some emails stopped delivering. Others went straight to spam. Then one day, he saw a warning:
“Your account has been restricted for unusual activity.”
He panicked.
He had spent time building his email list, and suddenly, he couldn’t reach any of them.
That moment made something very clear to both of us:
Sending an email is easy.
But sending the right email, to the right person, at the right time—and making sure it actually reaches their inbox—that’s a different game. And you need the right tool for it.
Maybe you’re in that same situation right now.
Maybe you’ve tried sending emails from your regular account, and it stopped working.
Maybe you’re asking yourself:
“Which bulk email service is actually good for beginners like me?”
“Why do my emails keep going to spam?”
“Is there a simple and affordable tool I can use without stress?”
“How can I grow my OsasBlog audience without looking like a spammer?”
If any of these sound like you, don’t worry—you’re not alone.
And you’re in the right place.
This guide is not about confusing tech terms or empty promises. It’s about helping you choose a tool that works—something simple, reliable, and effective.
So you can focus on what really matters: creating good content, sharing value, and building trust with your readers.
Because at the end of the day, email is not just about sending messages.
It’s about starting real conversations.
And with the right bulk email service, you can do that easily, safely, and at any scale.
What You Will Learn
By the end of this guide, you will clearly understand:
How bulk email services really work
The top 15 best email platforms in 2026
Which ones are beginner-friendly
Which ones are powerful for scaling
How to choose the right one for your needs
Mistakes that can destroy your email success
Quick Answer
A bulk email service provider is a platform that helps you send a large number of emails to many people at once, while making sure your messages actually reach them and perform the way they should.
It’s not just about clicking “send” to thousands of contacts. It’s about doing it the right way—so your emails land in the inbox (not spam), your audience stays engaged, and you avoid both technical and legal problems.
High deliverability
This means the platform works behind the scenes to build trust with email providers like Gmail, Yahoo, and Outlook. It uses clean and trusted servers, monitors your sender reputation (which works like a credit score for your email), and slowly warms up new sending addresses instead of sending too much at once.
It also controls how fast emails are sent to avoid raising red flags. Before sending, it checks your content for spam triggers like too many exclamation marks, suspicious links, or poor balance between text and images, and warns you if something looks risky.
The result is simple: more of your emails reach real inboxes instead of the spam folder.
Proper email authentication (DKIM, SPF, etc.)
These act like digital ID cards for your emails.
SPF tells email providers which servers are allowed to send emails on your behalf. DKIM adds a secure signature to each message so the receiver knows it truly came from you and was not changed. DMARC sets rules for what should happen if something fails and also sends you reports so you can detect problems.
A good bulk email platform helps you set all this up step by step, even if you are not technical. Without these, your emails can look suspicious and may be blocked or ignored.
List management and automation
This is about keeping your contacts organized and your messages relevant.
You can import your contacts, clean your list, and group people based on things like interest, behavior, or when they signed up. For example, you can separate new subscribers, active readers, or customers.
The platform also removes invalid emails, handles unsubscribes instantly, and respects user preferences.
Automation allows you to create emails that send automatically, such as welcome messages, birthday offers, blog updates, or follow-ups based on what someone did or didn’t do. You set it up once, and it keeps working for you without manual effort.
Tracking
You don’t have to guess what is working.
The platform shows you clear data like who opened your email, which links were clicked, what device was used, and whether someone took action like signing up or making a purchase.
This helps you learn quickly—what subject lines work, what content performs best, and when your audience is most active—so you can improve every time you send.
In simple terms
It is the professional tool for sending emails safely, efficiently, and at scale.
Think of it like this: sending bulk emails without a proper service is like trying to run a delivery business using your personal car and a handwritten notebook. You might manage a few deliveries, but very soon you get overwhelmed, waste time, and make mistakes.
A bulk email provider works like a full logistics team. It handles delivery, tracking, compliance, and optimization, so you can focus on your message instead of the technical side.
It gives you the power of a large company’s email system without needing a large team. Whether you are sharing blog updates, sending business emails, or growing an audience, it ensures your message is delivered clearly, legally, and consistently.
What Bulk Email Services Really Do
Simple Explanation
Think of a bulk email service like a professional courier system.
Instead of you delivering letters yourself, the system handles everything — safely and efficiently.
Deeper Explanation
These platforms manage complex processes behind the scenes:
They use trusted servers
They control sending speed
They build sender reputation
They ensure emails pass spam filters
Without this system, your emails are treated as suspicious.
Deeper Evaluation
Email providers like Gmail don’t trust random senders.
If you suddenly send 1,000 emails from your personal account:
You get flagged
Your emails go to spam
Your account may be limited
Bulk email platforms solve this using:
Verified sending domains
Authentication protocols
Warm-up systems
Practical Understanding
Let’s make this very simple with a real-life picture.
Sending bulk emails manually = Walking from house to house, knocking on every door, and hoping someone lets you in.
You’re putting in effort. But most doors stay closed. Some people get annoyed. And after a while, the neighborhood security (that’s Gmail, Yahoo, and others) starts watching you—or even stops you completely.
Using a bulk email service = Being invited into people’s homes because they already know and trust you.
You still knock—but only on doors of people who already said, “Yes, I want to hear from you.” And when you enter, you can share something useful, start a conversation, or help—without worrying about being rejected.
That’s the real difference.
It’s not just about reaching more people. It’s about reaching the right people in a way that feels natural and helpful, not forced.
Now think about your OsasBlog.
When someone subscribes, they are giving you access to their inbox. That’s trust.
A bulk email service helps you respect that trust by:
Making sure your emails arrive properly (not ending up in spam)
Keeping your email list clean (so you only message people who are interested)
Helping you send the right content at the right time (like blog updates, tips, or useful messages)
Showing you what is working so you can improve every time
Without the right tool, you are just guessing.
With the right tool, you are building a real relationship—one email at a time.
So yes, you can keep knocking on doors manually.
But it’s better when people are already waiting to welcome you in.
Top 15 Best Bulk Email Service Providers in 2026
1. Mailchimp – Deep Practical Understanding
Mailchimp is one of those tools that makes things feel easy, even if you don’t know anything about email marketing.
The moment you enter the platform, everything is already arranged in a way that guides you. You are not guessing what to click or what to do next. It walks you through the process step by step.
When you add people to your email list, Mailchimp doesn’t just store them. It starts watching how they behave.
It knows:
Who opens your emails
Who clicks your links
Who ignores everything
From there, it helps you separate your audience without stress.
So instead of sending the same message to everybody, you can send different messages based on how people behave. That alone can improve your results a lot.
Another thing Mailchimp does very well is how your email looks when it gets to people.
You don’t need to design anything from scratch. You just pick a template, adjust it, and you’re good. The emails are already arranged to look clean on phone and desktop.
That matters because most people read emails on their phones.
Now let’s talk about automation.
Mailchimp allows you to set simple flows like:
When someone joins your list → send welcome email
When someone clicks something → send another email
When someone stays inactive → send reminder
It feels simple, but it is powerful when used well.
The only issue is that the deeper automation is not fully available on cheaper plans. As your needs grow, you’ll notice you have to upgrade.
Then comes the pricing.
Mailchimp charges you based on how many contacts you have. Not how many emails you send.
So even if someone on your list is not active, you are still paying for that person. As your list grows, your cost grows too — and it can become expensive faster than expected.
Also, Mailchimp is strict.
If your emails look spammy or your list is not clean, they can limit or suspend your account. This is good for deliverability, but you need to be careful.
Pros
Very easy to use, even if you’re new
Helps you understand your audience behavior
Emails come out clean and professional
Good inbox delivery (emails don’t easily enter spam)
Strong support for beginners
Cons
Becomes expensive as your list grows
You pay for inactive contacts too
Advanced features are locked behind higher plans
Strict rules can affect your account if not careful
2. Brevo (Formerly Sendinblue) – Deep Practical Understanding
Brevo works differently from Mailchimp, and that difference is what makes it powerful.
Instead of focusing on simplicity first, Brevo focuses on control and cost.
The biggest thing to understand is this:
Brevo does not charge you for how many contacts you have.
It charges you for how many emails you send.
That changes everything.
You can have a very large list, and still pay less — as long as you’re not sending emails every single day.
So if you’re running a business where you send emails occasionally, Brevo saves you money.
Now, beyond email, Brevo is more like a full communication system.
You can:
Send emails
Send SMS
Manage customer data
All inside one place.
This is useful because customers don’t always respond to email alone. Sometimes SMS works better, especially for urgent messages.
Brevo also gives you a simple CRM system.
This means you can see:
What each customer has done
What they clicked
How they interacted with your business
This helps you send more personal messages instead of random broadcasts.
Now let’s talk about automation.
Brevo allows you to build flows based on what users do.
For example:
Someone signs up → they get a welcome email
Someone ignores your emails → they get a reminder
Someone takes action → they get a follow-up
The good thing is that Brevo gives you access to these features even on lower plans. You don’t need to spend too much before you start using real automation.
But Brevo is not perfect.
The design side is not as smooth as Mailchimp. Templates are more basic, and the interface is not as polished.
Also, the analytics are simple. You can see results, but not in a very deep or visual way.
Pros
Much cheaper for large email lists
You don’t pay for stored contacts
Includes email, SMS, and customer management
Good automation without needing expensive plans
Suitable for growing businesses
Cons
Their interface is not as smooth or beginner-friendly
Email designs are more basic
Analytics are not very detailed
Daily sending limits on free plan
Not as many integrations as bigger platforms
3. ConvertKit – Deep Practical Understanding
ConvertKit is built mainly for people who are growing an audience, not just selling products.
Think of bloggers, content creators, newsletter writers — people whose strength is connection, not just promotion.
The way ConvertKit works is very different from tools like Mailchimp.
Instead of focusing heavily on email design, it focuses on people and relationships.
When someone joins your list, ConvertKit doesn’t just see them as a contact. It allows you to tag them based on what they do.
For example:
Someone downloads your ebook → you tag them as “interested in ebooks”
Someone clicks a link → you tag them based on that interest
Someone buys something → you tag them as a customer
So instead of managing one big list, you’re building a smart audience system.
This makes your emails feel more personal.
You’re not just broadcasting messages — you’re talking to the right people at the right time.
Another thing about ConvertKit is the way emails look.
It doesn’t focus too much on fancy designs. Most emails are simple, clean, and text-based.
This is actually intentional.
Simple emails:
Feel more personal
Look like normal messages
Often get better open rates
Automation is also strong, but it is designed in a way that creators can understand without stress.
You can build flows like:
Someone subscribes → send welcome series
Someone clicks a topic → send related content
Someone buys → stop promo emails
However, ConvertKit is not built for heavy ecommerce or complex marketing systems. It shines more in content-driven businesses.
Pros
Perfect for bloggers and content creators
Strong tagging system for organizing audience
Simple and clean email style that feels personal
Easy-to-understand automation
Good for building long-term audience relationships
Cons
Limited design options for emails
Not ideal for advanced ecommerce marketing
Can be expensive as your list grows
Fewer features compared to all-in-one platforms
4. GetResponse – Deep Practical Understanding
GetResponse is designed for people who want everything in one place.
Instead of using separate tools for emails, landing pages, and funnels, GetResponse combines everything into a single system.
This makes it very useful for businesses that want to build and manage complete marketing systems without switching between platforms.
With GetResponse, you can:
Create landing pages
Build sales funnels
Host webinars
Send email campaigns
All from one dashboard.
Let’s break that down in a simple way.
If you want to run a campaign, you can:
Create a landing page
Collect emails
Send automated emails
Guide users into a sales funnel
Everything connects smoothly.
This reduces stress and saves time because you are not trying to connect different tools together.
Another strong part of GetResponse is its visual funnel builder.
You can literally see how your marketing process flows:
From signup
To email
To offer
To conversion
This makes it easier to understand what is working and what is not.
It also includes webinar tools, which is something many email platforms don’t offer.
This is useful if you:
Teach
Sell courses
Run live sessions
However, because GetResponse tries to do many things, it may feel a bit heavy at first.
Beginners might need some time to understand how everything connects.
Pros
All-in-one platform (email, funnels, landing pages, webinars)
Saves cost of using multiple tools
Strong funnel and campaign building system
Good for businesses and marketers
Useful for selling products or services
Cons
Can feel complex for beginners
Interface may take time to learn
Some features are locked behind higher plans
Not as simple as beginner-focused tools
5. ActiveCampaign – Deep Practical Understanding
ActiveCampaign is where email marketing becomes very serious.
This tool is not just about sending emails — it is about understanding and controlling customer behavior at a deep level.
If Mailchimp is simple, and Brevo is cost-focused, then ActiveCampaign is power-focused.
Everything in ActiveCampaign is built around automation and data.
It tracks what users do in detail:
Which emails they open
Which links they click
What pages they visit
How often they engage
From this, you can build very advanced automation flows.
For example:
If a user clicks a link but doesn’t buy → send follow-up
If a user visits a page multiple times → send targeted offer
If a user becomes inactive → move them to re-engagement sequence
These are not simple automations. They are behavior-driven systems.
ActiveCampaign also includes a strong CRM system.
This means you can manage your customers like a proper sales pipeline:
Track leads
Move them through stages
Follow up based on actions
This is very useful for businesses that deal with clients, sales calls, or high-value products.
But here is the truth — ActiveCampaign is not beginner-friendly.
There is a learning curve.
If you don’t understand how automation works, it can feel confusing at first.
But once you understand it, the control it gives you is very powerful.
Pros
Very powerful automation system
Deep customer behavior tracking
Strong CRM integration
Highly customizable workflows
Great for serious businesses and scaling
Cons
Not beginner-friendly
Takes time to learn properly
Can be expensive for small users
Setup can feel overwhelming at first
6. MailerLite – Deep Practical Understanding
MailerLite is one of those tools that doesn’t try to impress you with too many features. Instead, it focuses on doing the basics very well.
The moment you enter MailerLite, you notice how clean everything looks. No confusion, no clutter. You can easily find where to create emails, manage your subscribers, and set up automation.
It is built for people who want something simple but still effective.
When you add subscribers, MailerLite allows you to organize them using groups and segments. This helps you send the right message to the right people without stress.
The email builder is straightforward. You can drag and drop elements, add images, text, buttons — everything is easy to control. It may not be as advanced as some bigger platforms, but it is more than enough for most users.
Automation is where MailerLite quietly performs well.
You can create simple flows like:
Someone joins your list → send welcome email
Someone clicks a link → send follow-up
Someone completes an action → move them to another group
It may not be extremely advanced, but it covers what most small businesses and bloggers need.
Another good thing is that MailerLite gives you useful features without forcing you into expensive plans too quickly. That makes it a strong option if you are just starting but still want something reliable.
Where it falls short is in advanced marketing setups. If you want very deep automation or complex funnels, you may outgrow it.
Pros
Very clean and easy-to-use interface
Quick setup, no technical stress
Good automation for basic to mid-level needs
Affordable pricing for beginners
Reliable for newsletters and simple campaigns
Cons
Limited advanced automation features
Fewer integrations compared to bigger tools
Design flexibility is not very deep
Not ideal for large or complex marketing systems
7. Amazon SES – Deep Practical Understanding
Amazon SES is a completely different kind of tool.
It is not designed for marketers. It is built for developers and systems.
If tools like Mailchimp are like ready-made shops, Amazon SES is like having raw materials to build your own system from scratch.
The biggest advantage of Amazon SES is cost.
It is extremely cheap compared to most email platforms, especially when you are sending a large number of emails.
But that low cost comes with responsibility.
Amazon SES does not give you:
Drag-and-drop email builders
Ready-made templates
Easy dashboards
Instead, it gives you the ability to send emails through servers and APIs.
This means:
You need to configure it yourself
You need to connect it to your app or system
You need to manage things like email formatting and delivery
Another important part is sender's reputation.
With Amazon SES, you are responsible for how your emails perform. If your emails are marked as spam, it affects your setup directly.
So you need to:
Verify your domain
Set up authentication (like SPF, DKIM)
Keep your email list clean
This is why it is not beginner-friendly.
However, for businesses that send:
Transactional emails
System notifications
Large-scale campaigns
Amazon SES becomes very powerful and cost-efficient.
Pros
Very low cost, especially at scale
Highly reliable infrastructure
Perfect for large systems and applications
Full control over email sending
Scales easily as your business grows
Cons
Not beginner-friendly at all
No visual email builder or templates
Requires technical setup and knowledge
No built-in marketing tools
You handle deliverability and configuration yourself
8. SendGrid – Deep Practical Understanding
SendGrid sits somewhere between developer tools and marketing platforms.
It is widely used by apps, websites, and SaaS platforms because of how well it handles transactional emails and system messages.
If you have ever received:
Password reset emails
Account verification emails
Payment confirmations
There is a high chance tools like SendGrid were used behind the scenes.
The main strength of SendGrid is its API system.
This allows developers to connect email sending directly into their applications.
For example:
A user signs up → SendGrid automatically sends a welcome email
A user resets password → email is sent instantly
A transaction happens → receipt is delivered
Everything happens in real time, without manual work.
SendGrid also supports bulk email campaigns, but its strongest use case is still application-based email sending.
Unlike Amazon SES, SendGrid provides a bit more structure.
It includes:
Some templates
Basic dashboard
Email activity tracking
So it is slightly easier to use than raw systems like SES, but still requires some technical understanding for full use.
Another advantage is its reliability and delivery speed. Emails are sent quickly and consistently, which is important for apps and services.
However, if you are a beginner looking for simple email marketing, SendGrid may not feel comfortable. It is better suited for platforms, developers, or growing tech businesses.
Pros
Excellent for transactional and system emails
Strong API for app integration
Reliable and fast email delivery
Scales well for SaaS and platforms
Includes basic templates and tracking
Cons
Not beginner-friendly for non-technical users
Limited marketing features compared to full platforms
Setup may require developer support
Interface is more functional than user-friendly
9. AWeber – Deep Practical Understanding
AWeber is what you use when you don’t want surprises.
It has been around for a long time, and because of that, it follows a very traditional email marketing structure.
Everything is list-based.
You create lists, add subscribers into those lists, and send emails to those lists. Simple.
But here is where it becomes important.
Because it uses a list system (instead of flexible tagging like newer tools), managing the same person across different campaigns can become repetitive.
For example:
One user joins two different forms
They may exist in two different lists
You may end up sending duplicate emails if you’re not careful
This is one of the main limitations compared to modern tools.
Now, where AWeber still performs well is deliverability consistency.
It has built strong trust over time with email providers. So your emails are less likely to land in spam if your setup is clean.
Automation is there, but it is sequence-based, not deeply behavior-driven.
You can do:
Welcome series
Time-based follow-ups
But not very complex logic like:
“If user clicks this AND visits this page → do this”
So AWeber works best when your marketing is linear, not complex.
Pros
Very stable and predictable platform
Strong inbox delivery reputation
Easy to understand list-based system
Good for simple campaigns and newsletters
Cons
List-based system can cause duplication issues
Limited behavior-based automation
Feels outdated compared to modern tools
Not efficient for complex segmentation
10. Moosend – Deep Practical Understanding
Moosend is one of those tools that looks simple at first, but becomes powerful when you start using it properly.
Its real strength is in automation + segmentation at a low cost.
When you add subscribers, Moosend allows you to track actions like:
Email opens
Click behavior
Website activity (if connected)
Now here is where it becomes useful.
You can build automation that reacts to those actions.
For example:
User clicks a product → send a targeted email
User visits a page but does nothing → send reminder
User buys → remove from promotion
This kind of flow is usually found in more expensive tools, but Moosend gives it at a lower price.
Another important feature is conditional logic inside automation.
This means your system is not just sending emails — it is making decisions.
Like:
If user is active → continue sequence
If user is inactive → switch path
That is how you start building smart campaigns.
However, Moosend still has limits.
It does not have a strong ecosystem. So when you want to connect it with many external tools, you may face restrictions.
Also, while automation is strong, the platform itself is not as polished or widely supported.
Pros
Strong automation for its price level
Supports behavior-based workflows
Good segmentation and targeting
Very cost-effective for growing businesses
Cons
Limited integrations
Smaller ecosystem and community
Interface is functional but not refined
May feel limited at very large scale
11. Constant Contact – Deep Practical Understanding
Constant Contact is built for one type of user:
Someone who just wants to send emails without thinking too much.
Everything is simplified on purpose.
But here is what you need to understand.
It removes complexity, but it also removes control.
When you create campaigns, you are mostly working with:
Basic templates
Simple contact lists
Straightforward sending
There is not much depth in terms of logic or behavior tracking.
So instead of building smart campaigns, you are mostly doing:
“Create → Send → Done”
This is not a bad thing, depending on your needs.
For example:
Local businesses
Small organizations
Events and announcements
This works perfectly.
But if you want to grow into advanced marketing, you will feel restricted quickly.
Automation exists, but it is minimal.
You won’t be able to build complex customer journeys or deep personalization.
So Constant Contact is more about comfort than power.
Pros
Very easy for non-technical users
Fast setup and campaign execution
Good support when you need help
Works well for basic communication
Cons
Very limited automation depth
Little control over advanced targeting
Not suitable for scaling marketing systems
Feels restrictive as your needs grow
12. HubSpot Email Marketing – Deep Practical Understanding
HubSpot is not just a tool — it is a full business engine.
Everything revolves around one thing:
The customer journey
When someone enters your system in HubSpot, they are tracked from start to finish.
Not just emails.
Everything.
When they visit your site
When they click something
When they respond
When they become a customer
All of this is stored inside the CRM.
Now, the email system is just one part of that bigger picture.
This means your emails are not random.
They are tied to where the person is in your business pipeline.
For example:
New lead → educational email
Interested lead → product-focused email
Customer → retention email
This level of control is what makes HubSpot powerful.
Automation is also deeply connected to this system.
You can create workflows that depend on:
User behavior
Sales stage
Interaction history
So your marketing becomes structured, not guesswork.
But here is the trade-off.
HubSpot is heavy.
It takes time to learn
It requires proper setup
And it becomes expensive as you scale
So it is not for casual users.
It is for businesses that are ready to build systems, not just send emails.
Pros
Deep integration between email, CRM, and sales
Full visibility of customer journey
Very powerful automation logic
Ideal for scaling and structured growth
Cons
Expensive at higher levels
Requires time and effort to set up properly
Too complex for simple use cases
Not beginner-friendly
13. Benchmark Email – Deep Practical Understanding
Benchmark Email is built for simplicity, but let’s be clear — it is simple by design, not by limitation alone.
It focuses on one thing:
Sending clean, well-structured emails without complications.
When you use Benchmark, you don’t deal with too many options.
You:
Pick a template
Edit your content
Send your campaign
That’s it.
This makes it very useful for users who don’t want to spend time learning systems.
But here is the deeper reality.
Benchmark does not focus much on data-driven marketing.
So things like:
Deep segmentation
Behavior tracking
Advanced automation
Are either limited or basic.
This means you are mostly doing broadcast emails, not smart targeting.
If your goal is just to stay in touch with your audience, it works fine.
But if your goal is to increase conversions through strategy, you may outgrow it.
Pros
Very simple and easy to use
Clean email design and delivery
Quick campaign setup
Good for newsletters and updates
Cons
Very limited automation capabilities
Weak behavioral targeting
Basic analytics
Not suitable for growth-focused marketing
14. Elastic Email – Deep Practical Understanding
Elastic Email is built for volume and control, not simplicity.
It sits between marketing tools and developer systems.
The main thing to understand is this:
It gives you power, but expects you to know what you’re doing.
Elastic Email allows you to send a very large number of emails at a low cost.
But beyond that, it also gives you control over:
Sending methods
API integration
Email delivery configuration
So you can use it in two ways:
As a marketing platform
As a backend email engine
This flexibility is what makes it valuable.
Now let’s go deeper.
Elastic Email gives you access to detailed delivery settings.
This means you can control:
How emails are sent
How fast they are sent
How your sender reputation behaves
This is important for high-volume sending.
Because at scale, deliverability is everything.
But here is the challenge.
You are more responsible.
Unlike beginner tools that guide you, Elastic Email expects you to:
Understand email infrastructure
Manage your sending reputation
Optimize your campaigns yourself
So while it is powerful, it is not forgiving.
Pros
Very strong for high-volume email sending
Affordable compared to many platforms
Flexible for both marketers and developers
Detailed control over email delivery
Cons
Requires technical understanding
Not beginner-friendly
Less polished interface
You handle more responsibility for deliverability
15. Mailgun – Deep Practical Understanding
Mailgun is not built for marketers. It is built for developers and systems that need emails to work perfectly every time.
If you’re running a platform, app, or any system where emails are triggered by user actions, Mailgun is one of the tools designed for that exact job.
Think about things like:
Account verification emails
Password reset emails
Payment receipts
System alerts
Mailgun handles these kinds of emails very well.
How Mailgun Actually Works
Mailgun is mainly API-driven.
This means instead of logging into a dashboard to send campaigns, you connect Mailgun directly to your application.
So when something happens in your system:
A user signs up → Mailgun sends email instantly
A user requests reset → Mailgun delivers message immediately
Everything is automatic and happens in real time.
What Makes Mailgun Different
The biggest strength of Mailgun is deliverability control and monitoring.
It doesn’t just send emails — it shows you what is happening behind the scenes.
You can see:
Whether emails were delivered
Whether they bounced
Whether they were opened
Whether they failed
This level of visibility is very important for serious systems.
It also gives you tools to protect your sender reputation, like:
Email validation (to avoid fake emails)
Spam filtering
Domain authentication setup
So instead of guessing, you are working with real data.
Sending at Scale
Mailgun is built for scale.
If you are sending:
Thousands
Hundreds of thousands
Or even millions of emails
Mailgun can handle it without breaking.
And unlike many marketing tools, it stays stable under heavy load.
Where Mailgun Fits Best
Mailgun is best when:
You are building a SaaS platform
You have a web app
You need reliable transactional emails
You have a developer or technical setup
It is not designed for:
Beginners
Bloggers
Simple newsletter sending
Marketing vs System Use (Important Difference)
Mailgun is not focused on:
Fancy email templates
Drag-and-drop builders
Campaign design
Instead, it focuses on:
Delivery, speed, and reliability
So if your goal is marketing design → this is not the best fit
If your goal is system email performance → this is excellent
Pros
Very strong for transactional emails
Reliable and fast delivery system
Deep tracking and monitoring tools
Good email validation and security features
Built for scaling applications
Cons
Not beginner-friendly
Requires technical setup and API knowledge
No visual email builder for marketing campaigns
Limited for traditional email marketing use
Needs proper configuration to perform well
Email Deliverability
This one is very important.
Because if your email does not enter inbox, everything you are doing is just waste.
Simple.
You can write the best message, design it well, even have a good offer…
If it goes to spam, nobody will see it.
What really affects it
Email systems are watching how people treat your emails.
They check things like:
Do people open your email?
Do they click anything?
Or they just ignore it?
Do they mark it as spam?
If many people ignore you or mark you as spam, your emails will start going to spam too.
Big mistake people make
Many people think:
👉 “Let me just get plenty emails (contacts)”
But that is wrong.
What matters is active people, not just plenty people.
If you have:
1,000 people that always open your email → very good
10,000 people that ignore you → very bad
Because low activity tells email systems that your messages are not important.
Another thing — consistency
If you send email today, then disappear for long, then come back again…
It affects your trust.
It’s better to send small emails regularly than to send big emails once in a while.
Simple truth
If your email is not entering inbox, nothing else matters
Email Automation
Automation is what makes your work easy.
Instead of sending emails by yourself every time, you set it once…
and it keeps working for you.
How it works
Something happens → email goes automatically.
Example:
Someone signs up → they receive welcome email
Someone clicks something → they receive another email
Someone buys → they stop seeing promo emails
You don’t touch anything. It just works.
Why this is powerful
Without automation:
You forget to send messages
You send late
You miss chances
With automation:
Everybody gets message at the right time
Your system works even when you are sleeping
You don’t stress yourself
Real understanding
Automation is like having someone working for you 24/7.
No break. No forgetting.
Simple truth
Automation is what turns email into real business tool
Email Segmentation
This one is very simple.
Not everybody on your list is the same.
What it means
You divide your people into groups.
Like:
New people
People that always read your emails
People that already bought something
Now you don’t talk to everybody the same way.
Why it matters
Imagine this:
You send “Buy now” message to someone that just joined today.
That person may not trust you yet.
But if you send:
“Welcome, let me show you how things work”
That makes more sense.
Same thing:
Active people → you can promote to them
Customers → you can upsell or support them
So one message cannot fit everybody.
What happens when you do it well
People open your emails more
People click more
People trust you more
And when this happens, your emails stop going to spam.
Simple truth
Right message to the right person = better results
Real Life Example
Let’s make it real.
My friend has a small Business he was managing
He was sending emails manually.
Before
Every time he wants to send message:
He copies emails
Sends one message to everybody
No system
What happened?
Emails were entering spam
He didn’t know who opened anything
Nobody was really responding
So even though he was sending emails… nothing was working.
After switching to Brevo
He didn’t just change tool. He changed how he was doing things.
First, he cleaned his list.
He removed people that were not active.
Then he set simple automation:
New person → welcome email
Interested person → follow-up
Buyer → different message
He also grouped people:
New users
Active readers
Customers
What changed
More people started opening emails
More people clicked
Emails stopped going to spam
He didn’t need to send manually again
And slowly…
Sales started increasing
Lesson
It was not magic.
It was:
Better deliverability
Automation
Segmentation
That’s what changed everything.
Comparison Table
Platform
Best For
Ease of Use
Pricing (Starting)
Power Level
Mailchimp
Beginners
Very Easy
From ~$13/month
Medium
Brevo
Budget Users
Easy
Free, then ~$9/month
High
ConvertKit
Creators
Easy
From ~$15/month
High
GetResponse
All-in-One Marketing
Moderate
From ~$19/month
High
ActiveCampaign
Advanced Automation
Moderate
From ~$29/month
Very High
MailerLite
Simplicity
Very Easy
Free, then ~$10/month
Medium
Amazon SES
Developers
Hard
~$0.10 per 1,000 emails
Very High
SendGrid
Apps & SaaS
Moderate
From ~$19.95/month
High
AWeber
Traditional Email
Easy
Free, then ~$12–$15/month
Medium
Moosend
Affordable Automation
Easy
From ~$7–$9/month
High
Constant Contact
Non-Tech Users
Very Easy
From ~$12/month
Medium
HubSpot Email
Growing Businesses
Moderate
Free, then ~$15+/month
Very High
Benchmark Email
Simple Campaigns
Very Easy
Free, then ~$13/month
Medium
Elastic Email
High Volume Sending
Moderate
~$15 for 50k emails
High
Mailgun
Developers / Systems
Hard
From ~$15/month
Very High
Common Mistakes People Make
Using Personal Email for Bulk Sending
This will get your account restricted quickly.
Buying Email Lists
This destroys your reputation and leads to spam complaints.
Ignoring Setup (SPF/DKIM)
Without proper setup, your emails won’t be trusted.
Sending Without Strategy
Just sending emails randomly doesn’t work.
Types of Email Services
Transactional Email Tools
Used for system emails like:
Password reset
Order confirmation
Marketing Email Tools
Used for:
Promotions
Newsletters
Hybrid Platforms
These combine everything in one system.
Summary Table
Category
Best Use Case
What It Means (Simple)
Providers
Beginner Tools
Easy setup
Very easy to use, no experience needed
Mailchimp, MailerLite, Constant Contact, Benchmark Email
Budget Tools
Low cost
Affordable but still powerful
Brevo, Moosend
Creator Tools
Audience growth
Best for building loyal audience
ConvertKit
All-in-One Tools
Everything in one place
Email + funnels + pages + marketing tools
GetResponse
Advanced Tools
Automation & scaling
Deep automation and smart workflows
ActiveCampaign, HubSpot
Traditional Tools
Simple & reliable
Old but stable email marketing style
AWeber
Developer Tools
Flexibility
Built for apps, APIs, and systems
Amazon SES, Mailgun, SendGrid
High Volume Tools
Bulk sending
Best for sending large number of emails
Elastic Email
Engagement Check
Let’s make this simple for you.
Ask yourself:
Are you just starting out?
Do you want automation to save time?
Do you prefer something simple, or something powerful?
There is no one perfect tool for everybody.
The right tool depends on where you are right now.
If you choose based on your current level, everything becomes easier.
My Conclusion
Bulk email is not just about sending messages.
It is about building something over time.
Trust
Relationship
Consistent communication
That is what makes people stay, listen, and eventually buy.
The platform you choose matters, but how you use it matters even more.
Start simple if you are new.
Don’t rush into complex tools you don’t understand yet.
As you grow, you can always upgrade.
Sometimes a hosting provider moves reseller accounts to a new server or upgrades their infrastructure. When this happens, the IP address connected to your private nameservers may need to be updated.
If the old IP address remains unchanged, domains using your nameservers may stop resolving properly. Websites might show errors or fail to load.
This situation once happened to a reseller who had many client websites running under his private nameservers. After his hosting provider migrated him to a new server, the websites stopped loading. The issue turned out to be simple — the nameserver IP address still pointed to the old server. After updating it from the client dashboard, everything worked again.
In this guide, you will learn exactly how to modify the reseller nameserver IP address from your hosting client area step by step.
What You Need Before Starting
Before you begin, make sure you have the following information ready.
Requirement
Description
Hosting client area access
Your login details for your hosting account
Reseller domain
The domain used for your private nameservers
Existing nameserver
Example: ns1.yourdomain.com or dns1.yourdomain.com
Old IP address
The IP address currently assigned to the nameserver
New server IP address
The IP address provided by your hosting provider
Your hosting provider usually provides the new IP address during server migration or setup.
Quick Video Guide
https://youtu.be/Vh3CqVlhF_0
Step-by-Step Text Guide
Step 1 — Log in to Your Client Area
Open your browser and visit your hosting provider’s website.
Find the Client Area or Login button.
Enter your:
Email address
Password
Then click Login.
After logging in, you will see your client dashboard, where you can manage domains and hosting services.
Step 2 — Open the Domains Section
On the dashboard menu, locate the Domains option.
Click Domains.
Step 3 --- A list of domains connected to your account will appear.
Look for the domain used for your reseller nameservers.
Example:
yourdomain.com
Click on that domain to open its management page.
Step 4 — Open Private Nameserver Management
Inside the domain management page, find the option labeled Private Nameservers.
Click Private Nameservers.
This section allows you to manage your custom nameservers.
Step 5 — Locate the Modify Nameserver Section
Inside the private nameserver page, you will see three available options:
Option
Purpose
Create Nameserver
Register a new private nameserver
Modify
Change the IP address of an existing nameserver
Delete
Remove a private nameserver
To change the IP address, go to the Modify section.
Step 6 — Enter the Nameserver and IP Addresses
In the Modify section, you will see fields where you can update the nameserver information.
Enter the following details:
Nameserver
Type the nameserver you want to modify.
Example:
ns1
or
dns1
(depending on the nameserver format you use)
Old IP Address
Enter the current IP address assigned to that nameserver.
Example:
192.168.1.10
New IP Address
Enter the new server IP address provided by your hosting provider.
Example:
45.67.89.100
After entering the information, click Save Changes.
Step 7 — Repeat for the Second Nameserver
Most reseller setups use two nameservers.
Example:
ns1.yourdomain.com
ns2.yourdomain.com
Repeat the same process for the second nameserver if necessary.
Example update:
Nameserver
Old IP
New IP
ns1
192.168.1.10
45.67.89.100
ns2
192.168.1.11
45.67.89.101
[Diagram: modifying second nameserver IP]
Step 8 — Allow Time for DNS Update
After saving the changes, the new nameserver IP address will begin updating across DNS networks.
This process is called DNS propagation.
Time
What Happens
Immediate
System saves the new IP
1–4 hours
Some networks update
Up to 24 hours
Global DNS update completes
During this time, some websites may still resolve using the old server.
Common Mistakes Beginners Should Avoid
These mistakes often cause problems when updating nameserver IP addresses.
Mistake
Explanation
Entering the wrong old IP address
The system may fail to update the record
Typing the wrong nameserver
The modification will not apply
Updating only one nameserver
Both ns1 and ns2 should usually be updated
Forgetting to save changes
The update will not take effect
Always double-check your entries before saving.
Helpful Tips
Confirm the new server IP with your hosting provider
Never guess the IP address. Always use the exact IP provided by your host.
Use consistent nameserver formats
Example:
ns1.yourdomain.com
ns2.yourdomain.com
or
dns1.yourdomain.com
dns2.yourdomain.com
Mixing formats can sometimes cause confusion.
Test your websites after updating
After the update, open one of your hosted domains to confirm it loads correctly.
Let Me Conclude
Updating the reseller nameserver IP address from your hosting client area is an important step when servers change or accounts are migrated. Once you know where to find the private nameserver management section and how to modify the IP address, the process becomes straightforward. Following the steps carefully ensures your domains continue pointing to the correct server without interruption.
Starting a website always begins with one important thing — a domain name.
A domain name is the address people type in their browser to reach your website.
Examples include:
google.com
facebook.com
osasblog.com
If you want to start a blog, a business website, or even an online store, the first step is buying a domain.
When I bought my first domain years ago, I was honestly confused. Many websites were selling domains, prices were different everywhere, and I was not sure which buttons to click.
But once I went through the process step by step, I realized it was actually very simple.
In this guide, you will learn exactly how to buy a domain name online, even if you have never done it before.
Video Guide
https://www.youtube.com/watch?v=aXA9FmTwD1o
What You Need Before Buying a Domain
Before starting the purchase process, make sure you have these things ready.
• the domain name you want to buy
• an email address
• a payment method (card, PayPal, or other supported option)
It also helps to think of two or three alternative names, in case your first choice is already taken.
Step 1 — Choose a Domain Registrar
A domain registrar is a company that sells domain names.
Some popular registrars include:
• Namecheap
• GoDaddy
• Porkbun
• Google Domains
• Dynadot
• Zenoxcloud
These companies are accredited to register domain names.
For this tutorial, the steps are similar across most registrars.
Step 2 — Open the Domain Registrar Website
Open your web browser and visit the registrar website.
When the homepage loads, you will usually see a domain search box.
This search box allows you to check whether the domain you want is available.
Step 3 — Search for Your Domain Name
Click inside the search box and type the domain you want.
Example:
osasblog.com
Then click the Search button.
The system will now check if that domain name is available.
Step 4 — Check Domain Availability
After searching, you will see one of two results.
If the domain is available
You will see something like:
"Great news, this domain is available."
If the domain is already taken
The registrar may show suggestions like:
• osasblog.net
• osasblog.org
• osasblogonline.com
Choose the one that works best for you.
Step 5 — Add the Domain to Cart
Once you find an available domain you like, you will see a button such as:
Add to Cart
Buy Now
Register
Click the button.
The domain will now be added to your shopping cart.
Step 6 — Review the Domain Purchase Page
On the cart page, you will see several options.
Typical options include:
• domain registration period
• privacy protection
• auto renewal settings
Here are some tips.
Registration Period
You can usually register a domain for 1 to 10 years.
Beginners often start with 1 year.
Privacy Protection
Some registrars offer WHOIS privacy protection.
This hides your personal details from public databases.
Many registrars offer this free.
Auto Renewal
Auto renewal ensures your domain renews automatically before expiration.
This helps prevent losing your domain.
Step 7 — Create Your Account
Before completing the purchase, the registrar will ask you to create an account.
You will need to enter:
• your name
• email address
• password
• contact details
Make sure the email address is correct because you will receive important domain notifications there.
Step 8 — Enter Payment Details
Now you will see the checkout page.
Choose your payment method.
Most registrars accept:
• debit cards
• credit cards
• PayPal
• digital wallets
• Bank Transfer
Enter your payment information and confirm the purchase.
Step 9 — Complete the Purchase
After payment is successful, you will see a confirmation message.
Your domain is now officially registered.
You will also receive an email confirming your purchase.
Step 10 — Access Your Domain Dashboard
Log into your registrar account.
You will now see your domain listed in your dashboard.
From here you can:
• manage DNS settings
• connect hosting
• update nameservers
• enable domain forwarding
This is where you control how your domain works.
Common Mistakes Beginners Should Avoid
Many beginners make small mistakes when buying domains.
Avoid these common issues.
Buying From Untrusted Websites
Always buy domains from well-known registrars.
Unknown websites may cause problems later.
Choosing Very Long Domain Names
Long domains are harder to remember.
Short, simple names are usually better.
Example:
bestdigitalmarketingtoolswebsite.com ❌
digitaltools.com ✔
Forgetting to Renew the Domain
If a domain expires, someone else may register it.
Always enable auto renewal.
Tips for Choosing a Good Domain Name
If you are starting a blog or business website, keep these tips in mind.
• choose something easy to spell
• avoid numbers and hyphens
• keep it short and memorable
• use common extensions like .com when possible
Good domain names are simple and easy to remember.
RoundUp
Buying a domain name is the first step toward building a website.
Although it may seem confusing at first, the process is actually very straightforward.
You simply choose a domain registrar, search for your domain name, add it to your cart, create an account, and complete the payment.
Once the purchase is complete, the domain becomes yours and you can begin connecting it to hosting or building your website.
When someone visits a website, what they see on the screen is the result of multiple technologies working together. Two of the most important technologies are HTML and CSS.
HTML builds the structure of the webpage, while CSS controls the design and appearance.
When beginners start learning web development, they often learn HTML first. After creating their first page, they quickly notice that the page looks very plain.
This is where CSS becomes important.
I remember the first time I created a simple webpage using only HTML. The content appeared correctly, but the page looked like a simple document — plain text, no colors, and no layout.
After adding CSS, everything changed. The headings looked bigger, the text spacing improved, and the page started to look like a real website.
Understanding how HTML and CSS work together is one of the most important steps in learning web development.
Understanding the Roles of HTML and CSS
HTML and CSS work like a team. Each one has a different job.
Technology
Role in a Website
HTML
Creates the structure of the page
CSS
Styles and designs the page
HTML defines things like:
• headings
• paragraphs
• images
• links
• lists
CSS controls things like:
• colors
• fonts
• spacing
• layout
• positioning
Visual Example of HTML and CSS Working Together
[Diagram: webpage structure created by HTML with CSS styling applied to headings, text, and layout]
HTML builds the content structure first.
CSS then styles that structure to make it visually appealing.
Basic Example of HTML and CSS on the Same Page
Here is a simple example showing how HTML and CSS can be combined inside one webpage.
<!DOCTYPE html>
<html>
<head>
<title>My Styled Webpage</title>
<style>
body{
background-color: #f4f4f4;
font-family: Arial, sans-serif;
}
h1{
color: darkblue;
text-align: center;
}
p{
color: #333;
font-size: 18px;
}
</style>
</head>
<body>
<h1>Welcome to My Website</h1>
<p>This webpage is styled using CSS.</p>
<p>HTML creates the structure while CSS controls the design.</p>
</body>
</html>
In this example:
• HTML creates the webpage structure.
• CSS inside the <style> section controls how the elements look.
What Happens When the Browser Loads This Page
[Diagram: browser reading HTML structure and applying CSS rules to render styled webpage]
When the browser opens this page, the following steps occur:
Step 1 — HTML is Loaded
The browser reads the HTML structure first.
Step 2 — CSS Rules Are Detected
The browser finds the CSS rules inside the <style> section.
Step 3 — Styles Are Applied
Each CSS rule is applied to matching HTML elements.
Step 4 — Final Webpage Appears
The browser displays the styled webpage.
This entire process happens extremely quickly.
Example: HTML Without CSS
[Diagram: webpage with plain text layout, no colors or styling]
If the same HTML page had no CSS, the webpage would look very simple:
• plain black text
• white background
• no layout control
• little spacing
Example: HTML With CSS
[Diagram: webpage with styled headings, colors, spacing and organized layout]
With CSS applied:
• headings become larger
• text colors improve readability
• spacing becomes comfortable
• layouts become organized
This is why CSS is essential for modern websites.
Using External CSS with HTML
Most professional websites do not write CSS directly inside HTML files. Instead, they store CSS in a separate file.
Example CSS file:
body{
background-color:#f2f2f2;
font-family: Arial;
}
h1{
color:darkgreen;
}
p{
font-size:18px;
color:#444;
}
The HTML file then connects to that CSS file.
<link rel="stylesheet" href="style.css">
This method has many advantages:
• cleaner HTML files
• easier website maintenance
• reusable styles across multiple pages
How Large Websites Use HTML and CSS
Modern websites often have many HTML pages, but they may use one central CSS file.
[Diagram: multiple HTML pages connected to a single CSS stylesheet]
For example:
HTML Page
Uses CSS File
home.html
style.css
about.html
style.css
contact.html
style.css
This keeps the design consistent across the entire website.
Common Beginner Mistakes When Combining HTML and CSS
When beginners first start combining HTML and CSS, they often run into small problems.
CSS File Not Linked Properly
If the CSS file is not connected correctly, the page will appear without styling.
Always check the file path.
Incorrect Selectors
If CSS selectors do not match HTML elements, the styles will not apply.
Example mistake:
Trying to style .title when the HTML element does not use that class.
Overwriting Styles Accidentally
Sometimes multiple CSS rules affect the same element. Because CSS is cascading, later rules may override earlier ones.
Helpful Tips for Beginners
If you are learning HTML and CSS together, these tips will help you progress faster.
• practice creating simple webpages
• use browser developer tools to inspect styles
• experiment with colors and layouts
• keep HTML structure clean and organized
• separate CSS into external files when possible
With consistent practice, understanding how HTML and CSS work together becomes much easier.
My Conclusion
HTML and CSS are the two fundamental technologies used to build webpages.
HTML provides the structure by defining elements such as headings, paragraphs, images, and links.
CSS enhances that structure by controlling the visual design, including colors, fonts, spacing, and layout.
Together, HTML and CSS form the foundation of every modern website. Learning how they work together allows beginners to move from simple webpages to fully designed and professional-looking websites.
When most people start learning web development, the first thing they usually learn is HTML. HTML helps you create the structure of a webpage — headings, paragraphs, images, and links.
But something quickly becomes obvious.
The webpage looks very plain.
The text is black, the background is white, and everything appears stacked together with almost no spacing. It works, but it does not look like a modern website.
I remember the first time I created a small webpage using only HTML. It technically worked, but when I opened it in the browser it looked like a simple document rather than a real website.
Then I discovered CSS.
After adding just a few lines of CSS, the page suddenly had colors, spacing, and a clean layout. It started to look like a real website.
That is when I understood something important:
HTML builds the structure of a webpage, but CSS is what gives it design and style.
What CSS Means
CSS stands for Cascading Style Sheets.
CSS is the language used to style and design webpages.
While HTML describes the structure of the page, CSS controls how that structure appears to visitors.
CSS can control many visual aspects of a website, including:
• text colors
• font styles
• spacing between elements
• background colors and images
• page layout
• responsive design for mobile devices
• animations and visual effects
Without CSS, most websites would look like simple text documents.
A Simple Way to Understand HTML and CSS
Think of building a website like constructing a house.
Part of the House
Website Equivalent
Building structure
HTML
Interior and exterior design
CSS
Electricity and automation
JavaScript
HTML builds the walls, rooms, and foundation.
CSS decides the paint color, furniture placement, lighting style, and overall appearance.
What a Website Looks Like Without CSS
[Diagram: simple webpage showing plain text, no spacing, no colors, basic layout]
If a webpage used only HTML:
• all text would look similar
• there would be little spacing
• layouts would be very basic
• the page would not look visually appealing
This is why CSS is necessary for modern websites.
What a Website Looks Like With CSS
[Diagram: webpage layout with styled headings, colors, spacing, navigation bar and sections]
When CSS is applied:
• headings become visually clear
• spacing improves readability
• layouts become organized
• colors create a professional design
This transformation is what CSS provides.
How CSS Works Behind the Scenes
When a visitor opens a webpage, the browser must combine several resources to display the page correctly.
[Diagram: browser loading HTML file then applying CSS rules to render a styled webpage]
Here is the simplified process:
Step 1: Browser Requests the Webpage
The browser sends a request to the web server for the webpage.
Step 2: Server Sends HTML
The server returns the HTML file that contains the structure of the webpage.
Step 3: Browser Finds CSS Files
Inside the HTML file, there may be links to CSS files.
The browser loads these CSS files.
Step 4: CSS Rules Are Applied
The browser applies CSS rules to the HTML elements.
Each rule determines how elements should look.
Step 5: Final Page is Rendered
The browser combines everything and displays the final styled webpage.
This entire process usually takes only a fraction of a second.
Understanding CSS Rules
CSS works using selectors and properties.
A basic CSS rule looks like this:
p {
color: blue;
font-size: 18px;
}
Let’s break it down.
Selector
p
This tells the browser the rule applies to paragraph elements.
Property
color
font-size
These are styling properties.
Value
blue
18px
These define how the property should behave.
This rule means:
All paragraphs should display blue text with a font size of 18 pixels.
Where CSS Can Be Added
CSS can be added to webpages in three different ways.
Inline CSS
Inline CSS is written directly inside an HTML element.
<p
style="color:red;">Hello World
</p>
This method is usually used for small changes but is not ideal for large websites.
Internal CSS
Internal CSS is written inside the HTML document itself.
<style>
p {
color: green;
}
</style>
This applies styles only within that webpage.
External CSS
External CSS is the most common method.
Styles are written inside a separate file.
Example file:
style.css
p {
color: purple;
font-size: 18px;
}
The HTML file connects to the stylesheet.
<link rel="stylesheet" href="style.css">
This approach keeps design separate from structure and makes websites easier to maintain.
Important CSS Properties Beginners Should Know
Here are some commonly used CSS properties.
Property
Purpose
color
Changes text color
background-color
Sets background color
font-size
Adjusts text size
margin
Adds space outside elements
padding
Adds space inside elements
border
Creates borders
text-align
Aligns text
width
Controls element width
height
Controls element height
Learning these properties helps beginners quickly improve webpage design.
Understanding CSS Layout
CSS also controls how elements are arranged on a page.
[Diagram: website layout showing header, navigation bar, content section, sidebar and footer]
Modern CSS uses layout systems such as:
Flexbox
Flexbox helps align items in rows or columns.
It is useful for navigation bars and responsive designs.
CSS Grid
CSS Grid helps create complex layouts with rows and columns.
It is commonly used for full webpage structures.
Positioning
CSS also allows precise control over where elements appear using positioning rules.
Why CSS is Important for Websites
CSS plays a major role in modern web development.
It helps with:
• visual design
• consistent layouts
• responsive design for mobile devices
• faster website maintenance
• improved user experience
Without CSS, websites would be difficult to navigate and visually unappealing.
Common CSS Mistakes Beginners Make
When beginners start learning CSS, they often encounter small problems.
Forgetting Measurement Units
font-size: 20px
CSS requires units such as px, em, or rem.
Conflicting Styles
Sometimes multiple CSS rules affect the same element.
The browser applies rules based on the cascading system, which can cause confusion if not understood.
Incorrect File Linking
If the CSS file is not linked correctly in the HTML file, the styles will not load.
Always verify the file path.
Tips for Learning CSS Faster
If you want to improve quickly with CSS, these practices help a lot.
• practice building small layouts
• experiment with colors and fonts
• inspect websites using browser developer tools
• learn Flexbox and Grid early
• create simple webpage designs
CSS becomes easier the more you experiment with it.
My Conclusion
CSS is the language that gives websites their visual design.
While HTML creates the structure of a webpage, CSS controls how that structure appears to visitors by defining colors, layouts, fonts, and spacing.
Understanding CSS is essential for anyone who wants to build modern, visually appealing websites.
If you have ever thought about building a website, the first technology you will meet is HTML.
HTML is the foundation of almost every website on the internet. Every page you visit — whether it is a blog, online store, or news site — starts with HTML.
When I first tried creating a website many years ago, I expected something complicated. I imagined learning programming would take months before I could even see a simple webpage.
But the truth surprised me.
I opened a simple text editor, wrote a few lines of HTML, saved the file, and when I opened it in my browser, my first webpage appeared.
That moment made me realize something important: HTML is actually very beginner-friendly.
In this guide, you will learn what HTML is, how it works, and why it is the backbone of the web.
What HTML Means
HTML stands for HyperText Markup Language.
It is the standard language used to structure and display content on web pages.
HTML does not function like programming languages such as Python or JavaScript. Instead, it tells the browser how content should be organized and displayed.
For example, HTML tells the browser:
• This is a heading
• This is a paragraph
• This is an image
• This is a link
Without HTML, a webpage would just be plain text with no structure.
What HTML Does on a Webpage
HTML creates the structure of a webpage.
Think of it like the skeleton of a human body.
Website Component
Role
HTML
Structure
CSS
Design and styling
JavaScript
Interactivity
HTML organizes the content.
CSS makes it look beautiful.
JavaScript makes it interactive.
Together, these three technologies power modern websites.
A Simple HTML Structure
Every HTML page follows a basic structure.
<!DOCTYPE html>
<html>
<head>
<title>My First Webpage</title>
</head>
<body>
<h1>Hello World</h1>
<p>This is my first webpage.</p>
</body>
</html>
Let’s break down what this means.
DOCTYPE
This tells the browser that the document is an HTML5 page.
HTML Tag
The <html> tag wraps the entire webpage.
Everything inside it belongs to the webpage.
Head Section
The <head> contains information about the page such as:
• page title
• meta tags
• styles
• scripts
This part is not directly visible on the webpage.
Body Section
The <body> contains the content visitors actually see.
Examples include:
• headings
• paragraphs
• images
• links
• videos
How HTML Works Behind the Scenes
When someone opens a website, several things happen.
[Diagram: browser requesting HTML page from a web server]
Step-by-step process:
A user enters a website address in the browser.
The browser sends a request to the web server.
The server sends the HTML file.
The browser reads the HTML code.
The browser converts the HTML into a visual webpage.
The process happens in seconds.
Understanding HTML Tags
HTML works using tags.
Tags tell the browser how to display content.
Most HTML tags follow this structure:
<tagname>Content</tagname>
Example:
<p>This is a paragraph</p>
Here:
<p> means paragraph.
The closing tag </p> tells the browser where the paragraph ends.
Common HTML Tags Beginners Should Know
Here are some of the most commonly used HTML tags.
HTML Tag
Purpose
<h1>
Main heading
<h2>
Subheading
<p>
Paragraph
<a>
Link
<img>
Image
<ul>
Unordered list
<li>
List item
<div>
Container for layout
Example of a link:
<a href="https://example.com">Visit Website</a>
Example of an image:
<img src="image.jpg" alt="Example Image">
How a Simple Webpage Looks in HTML
Here is a small example of a basic webpage.
<!DOCTYPE html>
<html>
<head>
<title>My Blog</title>
</head>
<body>
<h1>Welcome to My Blog</h1>
<p>This is my first blog post.</p>
<p>I am learning HTML step by step.</p>
</body>
</html>
When opened in a browser, this code becomes a simple webpage with a title and two paragraphs.
Why HTML is Important
HTML is essential because it provides the foundation of the web.
Without HTML:
• browsers cannot structure content
• websites cannot display properly
• search engines cannot understand webpages
HTML also helps with:
• SEO structure
• accessibility
• webpage organization
Every web developer starts by learning HTM
Common Beginner Mistakes in HTML
When beginners start learning HTML, they often encounter small mistakes.
Here are a few common ones.
Forgetting Closing Tags
Example mistake:
<p>This is a paragraph </p>
Correct version:
<p>This is a paragraph</p>
Incorrect Tag Nesting
Wrong example:
<p><b>Text</p></b>
Correct version:
<p><b>Text</b></p>
Missing Attributes
Images need a source attribute.
Example:
<img src="photo.jpg">
Tips for Learning HTML Faster
If you are just starting, these tips will help.
• Practice by building small pages
• Use browser developer tools
• Experiment with different tags
• View the source code of websites
• Learn HTML together with CSS
HTML becomes easy once you start practicing regularly
My Conclusion
HTML is the basic language used to create and structure webpages.
It tells browsers how to display content such as headings, paragraphs, images, and links.
Although it may look technical at first, HTML is actually one of the easiest technologies to learn in web development.
Once you understand HTML, you take the first step toward building websites and understanding how the internet works behind the scenes.
INTRODUCTION
You might be wondering right now:
What exactly is a domain name, and why is it so important?
Have you ever typed a website name into your browser and instantly landed on a page, without thinking about what actually happens behind the scenes?
A domain name is one of the most important parts of any website. If you have ever typed something like google.com, facebook.com, or youtube.com into your browser, then you have already used a domain name.
When I first started learning about websites, I kept hearing the term “domain name,” but I didn’t really understand what it meant. I even made the mistake of thinking it was the same as hosting, and that confusion slowed me down a lot.
But many beginners building their first website do not clearly understand what a domain name really is or how it works.
On OsasBlog, we break things down in a simple way so that even someone completely new to websites can understand. In this guide, you will learn what a domain name is, how it works behind the scenes, and why every website needs one, so you not only understand it, but also see how it fits into the bigger picture of how the internet works.
What Is a Domain Name in Simple Terms?
A domain name is the address of a website that people use to access it on the internet.
Instead of remembering complex numbers (IP addresses), you simply type a name like:
osasblog.com
That name directs your browser to the correct website.
WHAT YOU WILL LEARN IN THIS GUIDE
What a domain name is
Why domain names exist
How domain names work behind the scenes
The parts and types of domain names
Differences between domain and hosting
How domain names affect your website success
Common mistakes beginners make
WHAT IS A DOMAIN NAME?
Simple Definition
A domain name is a human-friendly address used to identify a website on the internet.
It acts as a shortcut that replaces a long numerical IP address.
Deeper Explanation
Every website on the internet is stored on a server, and each server has a unique IP address.
These IP addresses look like this:
192.168.0.1
Now imagine trying to remember numbers like that for every website you visit.
That would be difficult, slow, and impractical.
So domain names were introduced to make navigation simple.
Simple Analogy
Think of a domain name like a contact name on your phone.
Instead of memorizing someone’s phone number, you save their name.
When you want to call them, you simply tap the name.
That’s exactly how domain names work.
WHY DOMAIN NAMES EXIST
The Core Problem They Solve
The internet was originally built for machines, not humans.
Machines understand numbers very well, but humans don’t.
So domain names solve one major problem:
Making the internet easy for humans to use
Engagement Hook
Have you ever tried remembering even three phone numbers without saving them?
Now imagine remembering thousands of IP addresses.
That’s why domain names are essential.
HOW DOMAIN NAMES WORK
Behind the Scenes Breakdown
When you type a domain name into your browser:
Your browser sends a request
The request goes to the DNS system
DNS translates the domain into an IP address
The request is sent to a web server
The server responds with website data
Your browser displays the website
Why This Happens So Fast
This entire process takes milliseconds because:
DNS systems are optimized
Servers respond quickly
Browsers cache information
PARTS OF A DOMAIN NAME
Let’s break this down using:
osasblog.com
Structure Explanation
osasblog → Second-level domain (your unique name)
.com → Top-level domain (extension)
Types of Domain Extensions
Type
Example
Purpose
Generic
.com, .net
General use
Organization
.org
Non-profits
Country
.ng, .uk
Location-based
Specialized
.tech, .store
Niche usage
TYPES OF DOMAIN NAMES
Top-Level Domain (TLD)
The extension part like .com or .org
Second-Level Domain
The main name you choose
Subdomain
Example: blog.osasblog.com
Why This Matters
Understanding types helps you:
Choose better domain names
Structure your website properly
Scale your content
DOMAIN NAME VS HOSTING
Many beginners confuse these two.
Comparison Table
Feature
Domain Name
Hosting
Role
Address
Storage
Function
Directs users
Stores website
Visibility
Public
Behind the scenes
Example
osasblog.com
Server
Simple Analogy
Domain = Address
Hosting = House
You need both for your website to work.
RELATED CONCEPTS
To fully understand domain names, you should also understand:
DNS (Domain Name System)
The system that translates domain names into IP addresses
Nameservers
They control where your domain points
You can also learn how nameservers work in another detailed guide on OsasBlog.
Web Hosting
Where your website files are stored
You can also learn about web hosting and how it works in another beginner-friendly guide on this blog.
HOW DOMAIN NAMES AFFECT SEO AND BRANDING
Your domain name can influence your website success.
Branding Impact
A clean domain name:
Builds trust
Is easy to remember
Looks professional
SEO Impact
While domain names alone do not guarantee ranking, they can:
Improve click-through rate
Help users remember your site
Strengthen brand signals
DOMAIN NAME LIFECYCLE
A domain name goes through stages:
Registration
You purchase the domain
Active Period
Domain is working normally
Expiration
Domain stops working if not renewed
Grace Period
You can still renew
Deletion
Domain becomes available again
Why This Matters
If you forget to renew your domain, you can lose it completely.
REAL LIFE EXAMPLE
Imagine opening a business shop.
Your domain name is your shop name and address.
If people can’t remember it or find it, they won’t visit.
That’s why choosing and maintaining a domain name is very important.
COMMON MISTAKES BEGINNERS MAKE
Confusing Domain and Hosting
They are different but work together
Choosing Long Names
Hard to remember and type
Using Complicated Words
Reduces trust and clarity
Forgetting Renewal
Can lose your domain
QUICK SUMMARY TABLE
Concept
Meaning
Domain Name
Website address
IP Address
Numerical location
DNS
Translator
Hosting
Website storage
ENGAGEMENT CHECK
At this point, ask yourself:
Do you now understand how a domain name works and why it exists?
If yes, then you now understand a core part of how the internet works.
MY FINAL THOUGHT
A domain name may seem like a small part of a website, but it plays a very important role.
It connects users to your content, builds your brand, and makes the internet easier to use.
Now that you understand what a domain name is and how it works, you are no longer just browsing the internet — you understand part of its foundation.
And that is a powerful step forward.
When people first start building websites, they often hear the term name server but have no idea what it really means. It sounds technical and complicated, yet it is actually one of the simplest parts of how the internet works.
A name server plays a very important role in making sure visitors can find your website online. Without it, typing a website address in a browser would not lead anywhere.
Let me explain it in a simple way.
Some years ago, when I bought my first domain name, I was excited to launch a website. I registered the domain and bought hosting. After that, the hosting company sent me something like this:
ns1.myhosting.com
ns2.myhosting.com
They told me to update my name servers.
At that time I had no idea what that meant.
I logged into my domain panel and saw a section called Nameservers. I replaced the existing values with the ones from my hosting company.
After a few hours, my website suddenly started loading online.
That moment helped me understand something very important:
Name servers are the bridge between your domain name and your website hosting.
What Is a Name Server?
A name server is a server that helps translate a domain name into the IP address of a web server.
Humans prefer names like:
google.com
facebook.com
osasblog.com
But computers communicate using numbers called IP addresses, like this:
142.250.190.78
A name server helps convert the domain name into the correct IP address so the browser can find the website.
A Simple Way to Understand It
Think of the internet like a large city.
Item
Real World Example
Internet Equivalent
Person’s name
John Smith
Domain name
House address
24 Park Avenue
IP address
Phone directory
Address lookup
Name server
If someone asks:
Where does John Smith live?
You check the directory to find the address.
That directory is similar to what a name server does on the internet.
What Happens When You Type a Website Address
When you type a website like:
www.osasblog.com
Many small processes happen behind the scenes.
Here is a simplified version of what happens.
Step 1 — Your Browser Makes a Request
Your browser asks:
Where is osasblog.com located?
Step 2 — The Request Goes to a DNS Resolver
Your internet provider checks its DNS cache to see if it already knows the address.
Step 3 — It Contacts the Name Server
If the address is not cached, the system asks the authoritative name server for the domain.
Step 4 — The Name Server Responds
The name server replies with the IP address of the web server.
Step 5 — The Website Loads
Your browser connects to that IP address and loads the website.
Behind the Scenes Example
Here is a simplified idea of how DNS records may look on a server.
Domain: yoursite.com A Record yoursite.com -> 192.328.1.10 CNAME Record www.yoursite.com -> yoursite.com MX Record mail.yoursite.com -> 192.328.1.10
The name server stores these records and tells browsers where to go.
Types of Name Servers
There are two main types.
Authoritative Name Server
This server holds the actual DNS records for the domain.
It gives the final answer when someone asks where the domain is located.
Recursive Name Server
This server acts like a middleman.
It receives requests from users and searches for the correct authoritative server.
Example
Type
What It Does
Recursive DNS
Finds the answer
Authoritative DNS
Provides the final answer
What Do Name Servers Look Like?
Most hosting companies give name servers like this:
ns1.hostingcompany.com
ns2.hostingcompany.com
Sometimes you may see:
ns1.cloudflare.com
ns2.cloudflare.com
Each name server contains DNS records that point your domain to your hosting server.
Why Websites Use Multiple Name Servers
You will often see two or more name servers for a domain.
Example:
ns1.host.com
ns2.host.com
This is done for reliability.
If one server fails, the other one can still respond.
It keeps websites accessible even if a server goes down.
Where Do You Change Name Servers
Name servers are changed in your domain registrar dashboard.
Common places include:
Namecheap
GoDaddy
Cloudflare
Porkbun
Dynadot
Zenoxcloud
Inside the domain settings, you will usually see a section called:
Nameservers
You simply replace the existing ones with the new ones from your hosting provider.
Example of Updating Name Servers
Old:
ns1.oldhost.com
ns2.oldhost.com
New:
ns1.newhost.com
ns2.newhost.com
Once updated, the change starts spreading across the internet.
What Is DNS Propagation
After changing name servers, the internet needs time to update.
This process is called DNS propagation.
It usually takes:
Time
What Happens
0 – 1 hour
Some networks update
6 – 24 hours
Most networks update
Up to 48 hours
Global update complete
During this period, some people may see the old site, while others see the new site.
Name Server vs DNS Records
Many beginners confuse these two.
Here is the difference.
Feature
Name Server
DNS Record
Role
Manages DNS records
Specific instructions
Location
On DNS servers
Inside DNS zone
Example
ns1.host.com
A record, MX record
Real Example Using a Blog
Let us imagine you run OsasBlog.
Your setup might look like this:
Domain: osasblog.com
Registrar: Zenoxcloud
Hosting: VPS server
You change the domain name servers to:
ns1.yourvpshost.com
ns2.yourvpshost.com
Inside those servers, the DNS record may point to:
192.168.100.25
Now when someone visits:
osasblog.com
The name server tells the browser:
The website is located at 192.168.100.25
Then the site loads.
Common Problems With Name Servers
Beginners often face issues like:
Wrong Name Server
If the nameserver is incorrect, the website will not load.
DNS Not Fully Propagated
After changes, some users may still see the old version of the site.
Missing DNS Records
Even if the name server is correct, the site may not load if the A record is missing.
How to Check Name Servers
You can check domain name servers using tools like:
WHOIS lookup
DNS checker tools
Terminal commands
Example command:
<pre><code> nslookup osasblog.com </code></pre>
This will display the DNS information for the domain.
Why Name Servers Are So Important
Without name servers:
Domains cannot connect to hosting
Websites cannot load
Emails cannot work
Subdomains cannot function
They act as the traffic controller of the internet.
I Will Conclude Here
A name server is a system that maps a domain name to the server where a website is hosted.
It helps translate human-friendly website names into numerical IP addresses that computers understand.
When someone types a website address in a browser, the name server helps locate the correct server where that website lives.
Once you understand this simple idea, managing domains, hosting, and DNS becomes much easier when building websites or running a blog like OsasBlog.
March 13, 2026
We value your privacy!
OsasBlog uses cookies to improve your browsing experience, analyze site traffic, and personalize content. By using this site, you agree to our cookie policy.
Cookie Policy